


Thermostat project
Description
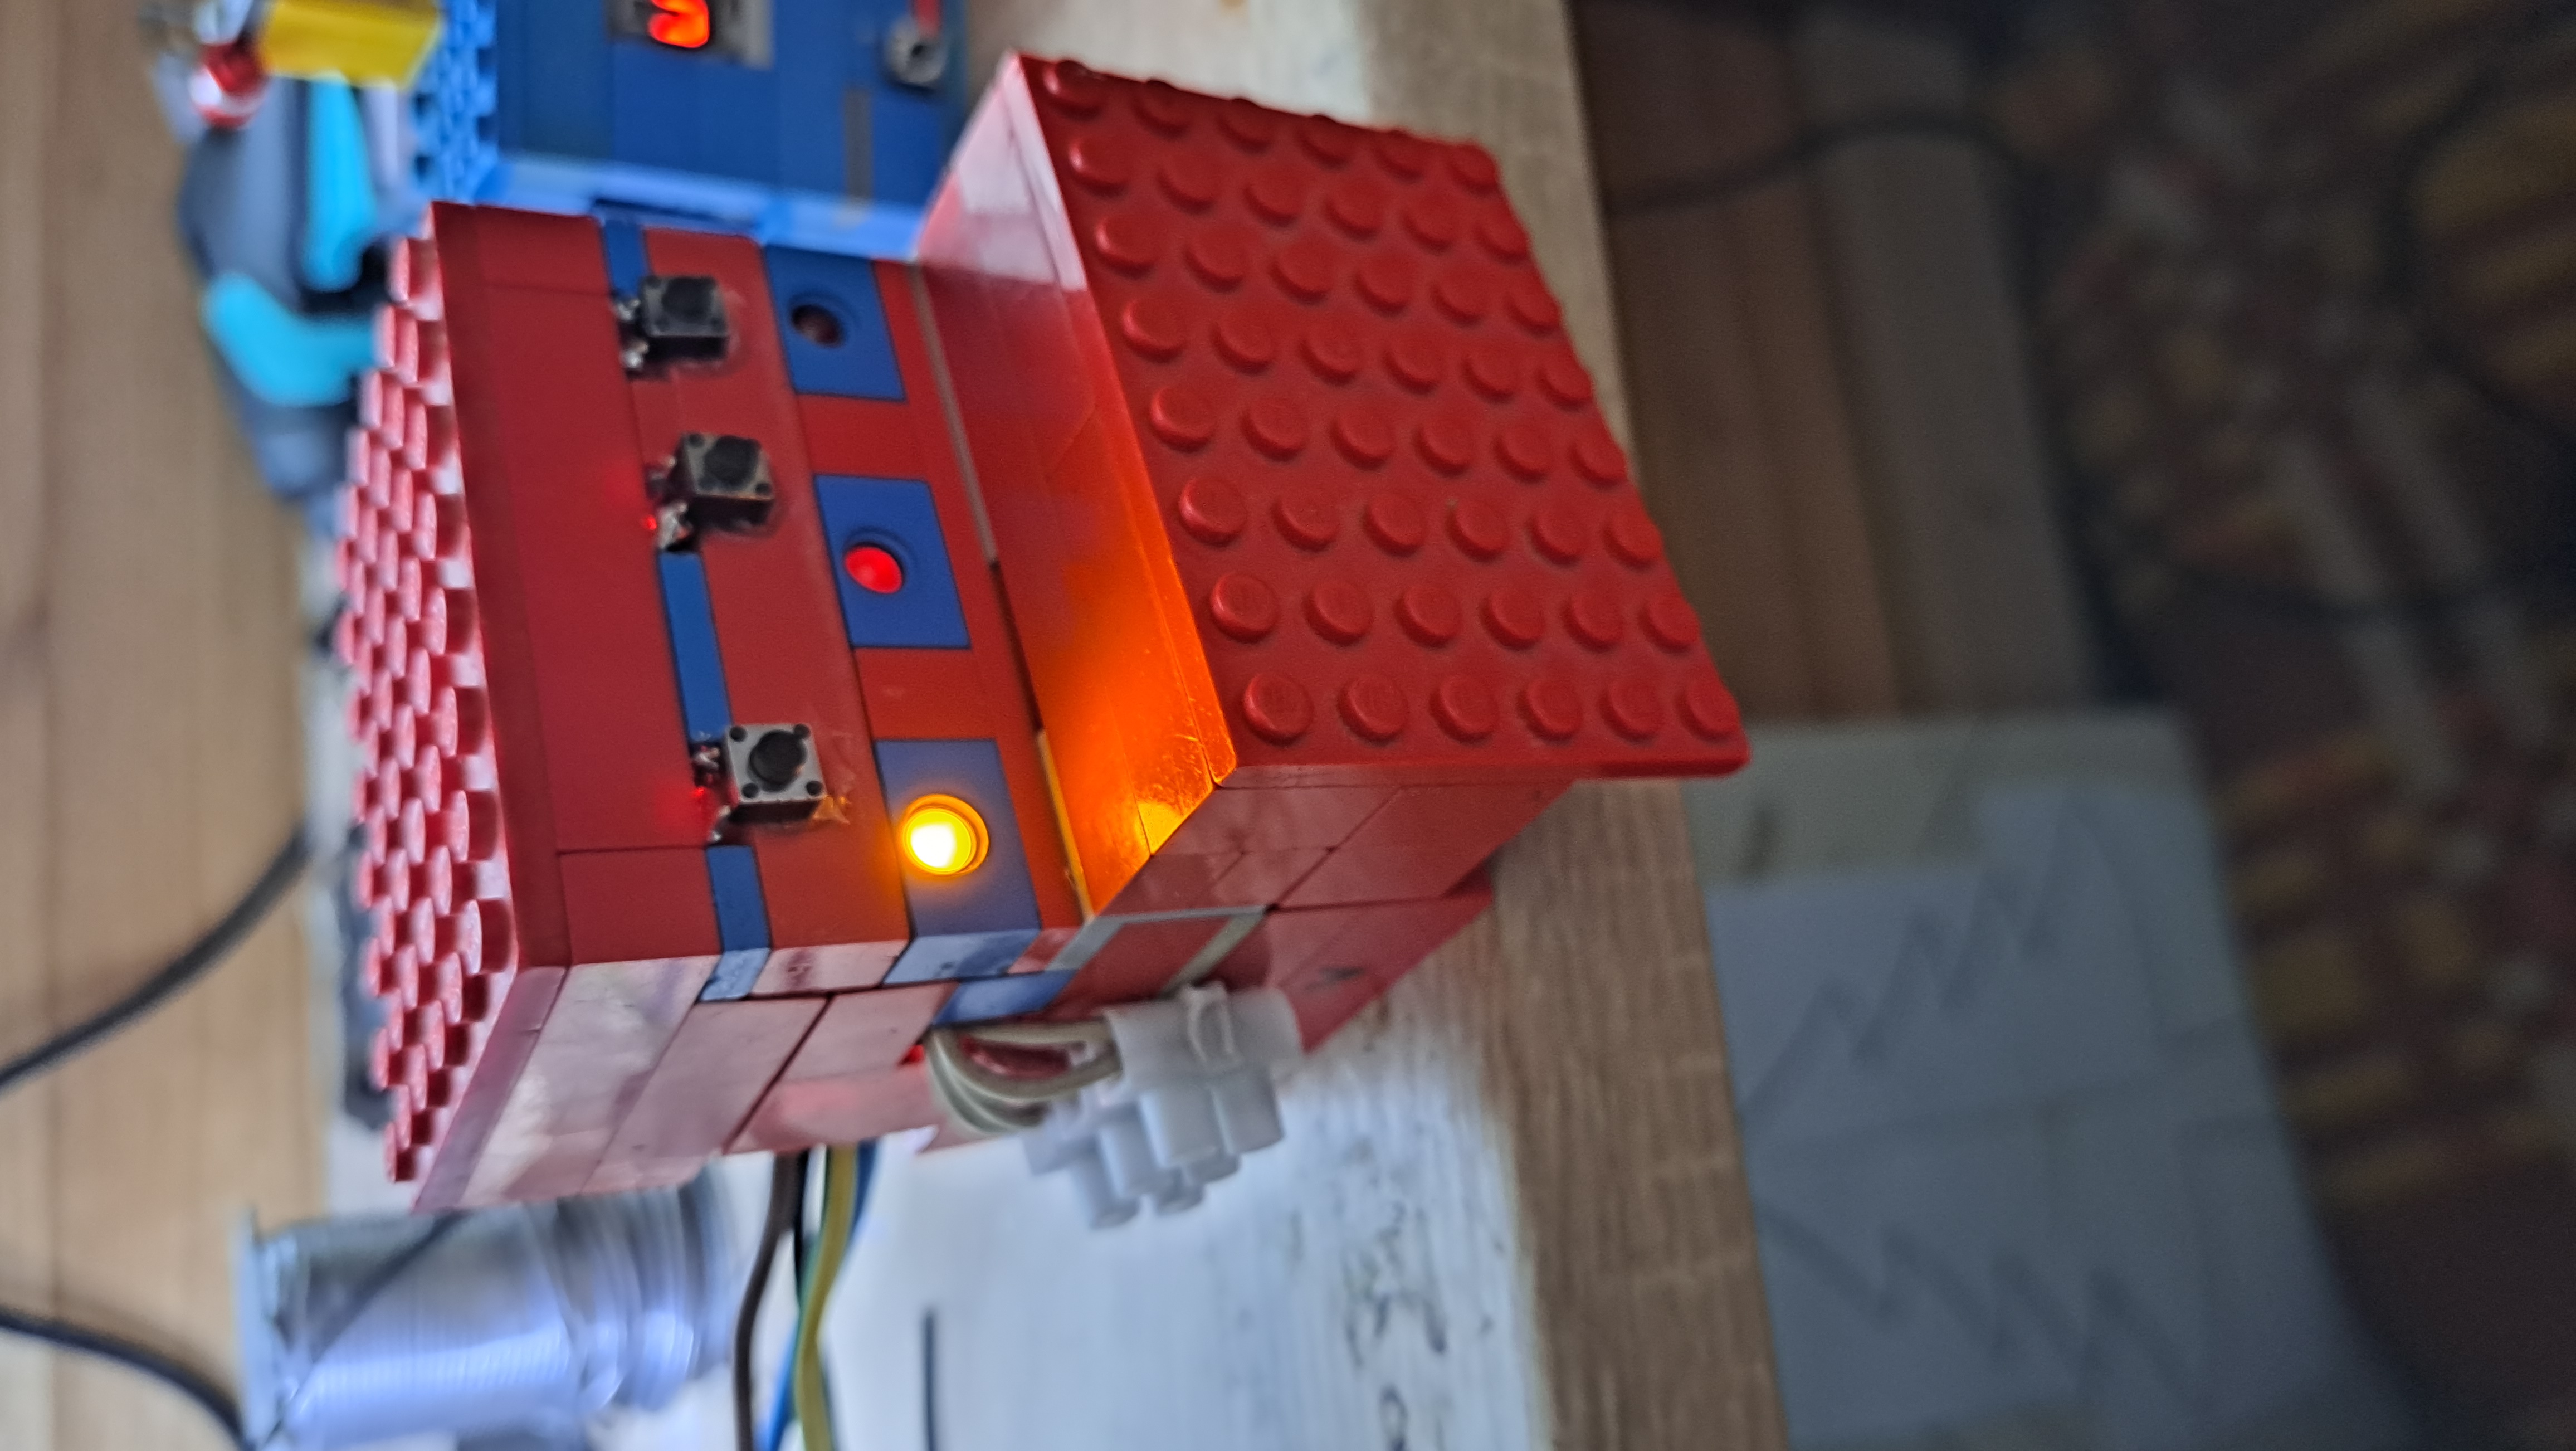
There are three buttons on the thermostat, the first one is the menu selector, with which we can move between the thermostat's menus. With the second and third buttons, the values found in the menus can be modified (increased or decreased) depending on what value you want to set in the given menu.
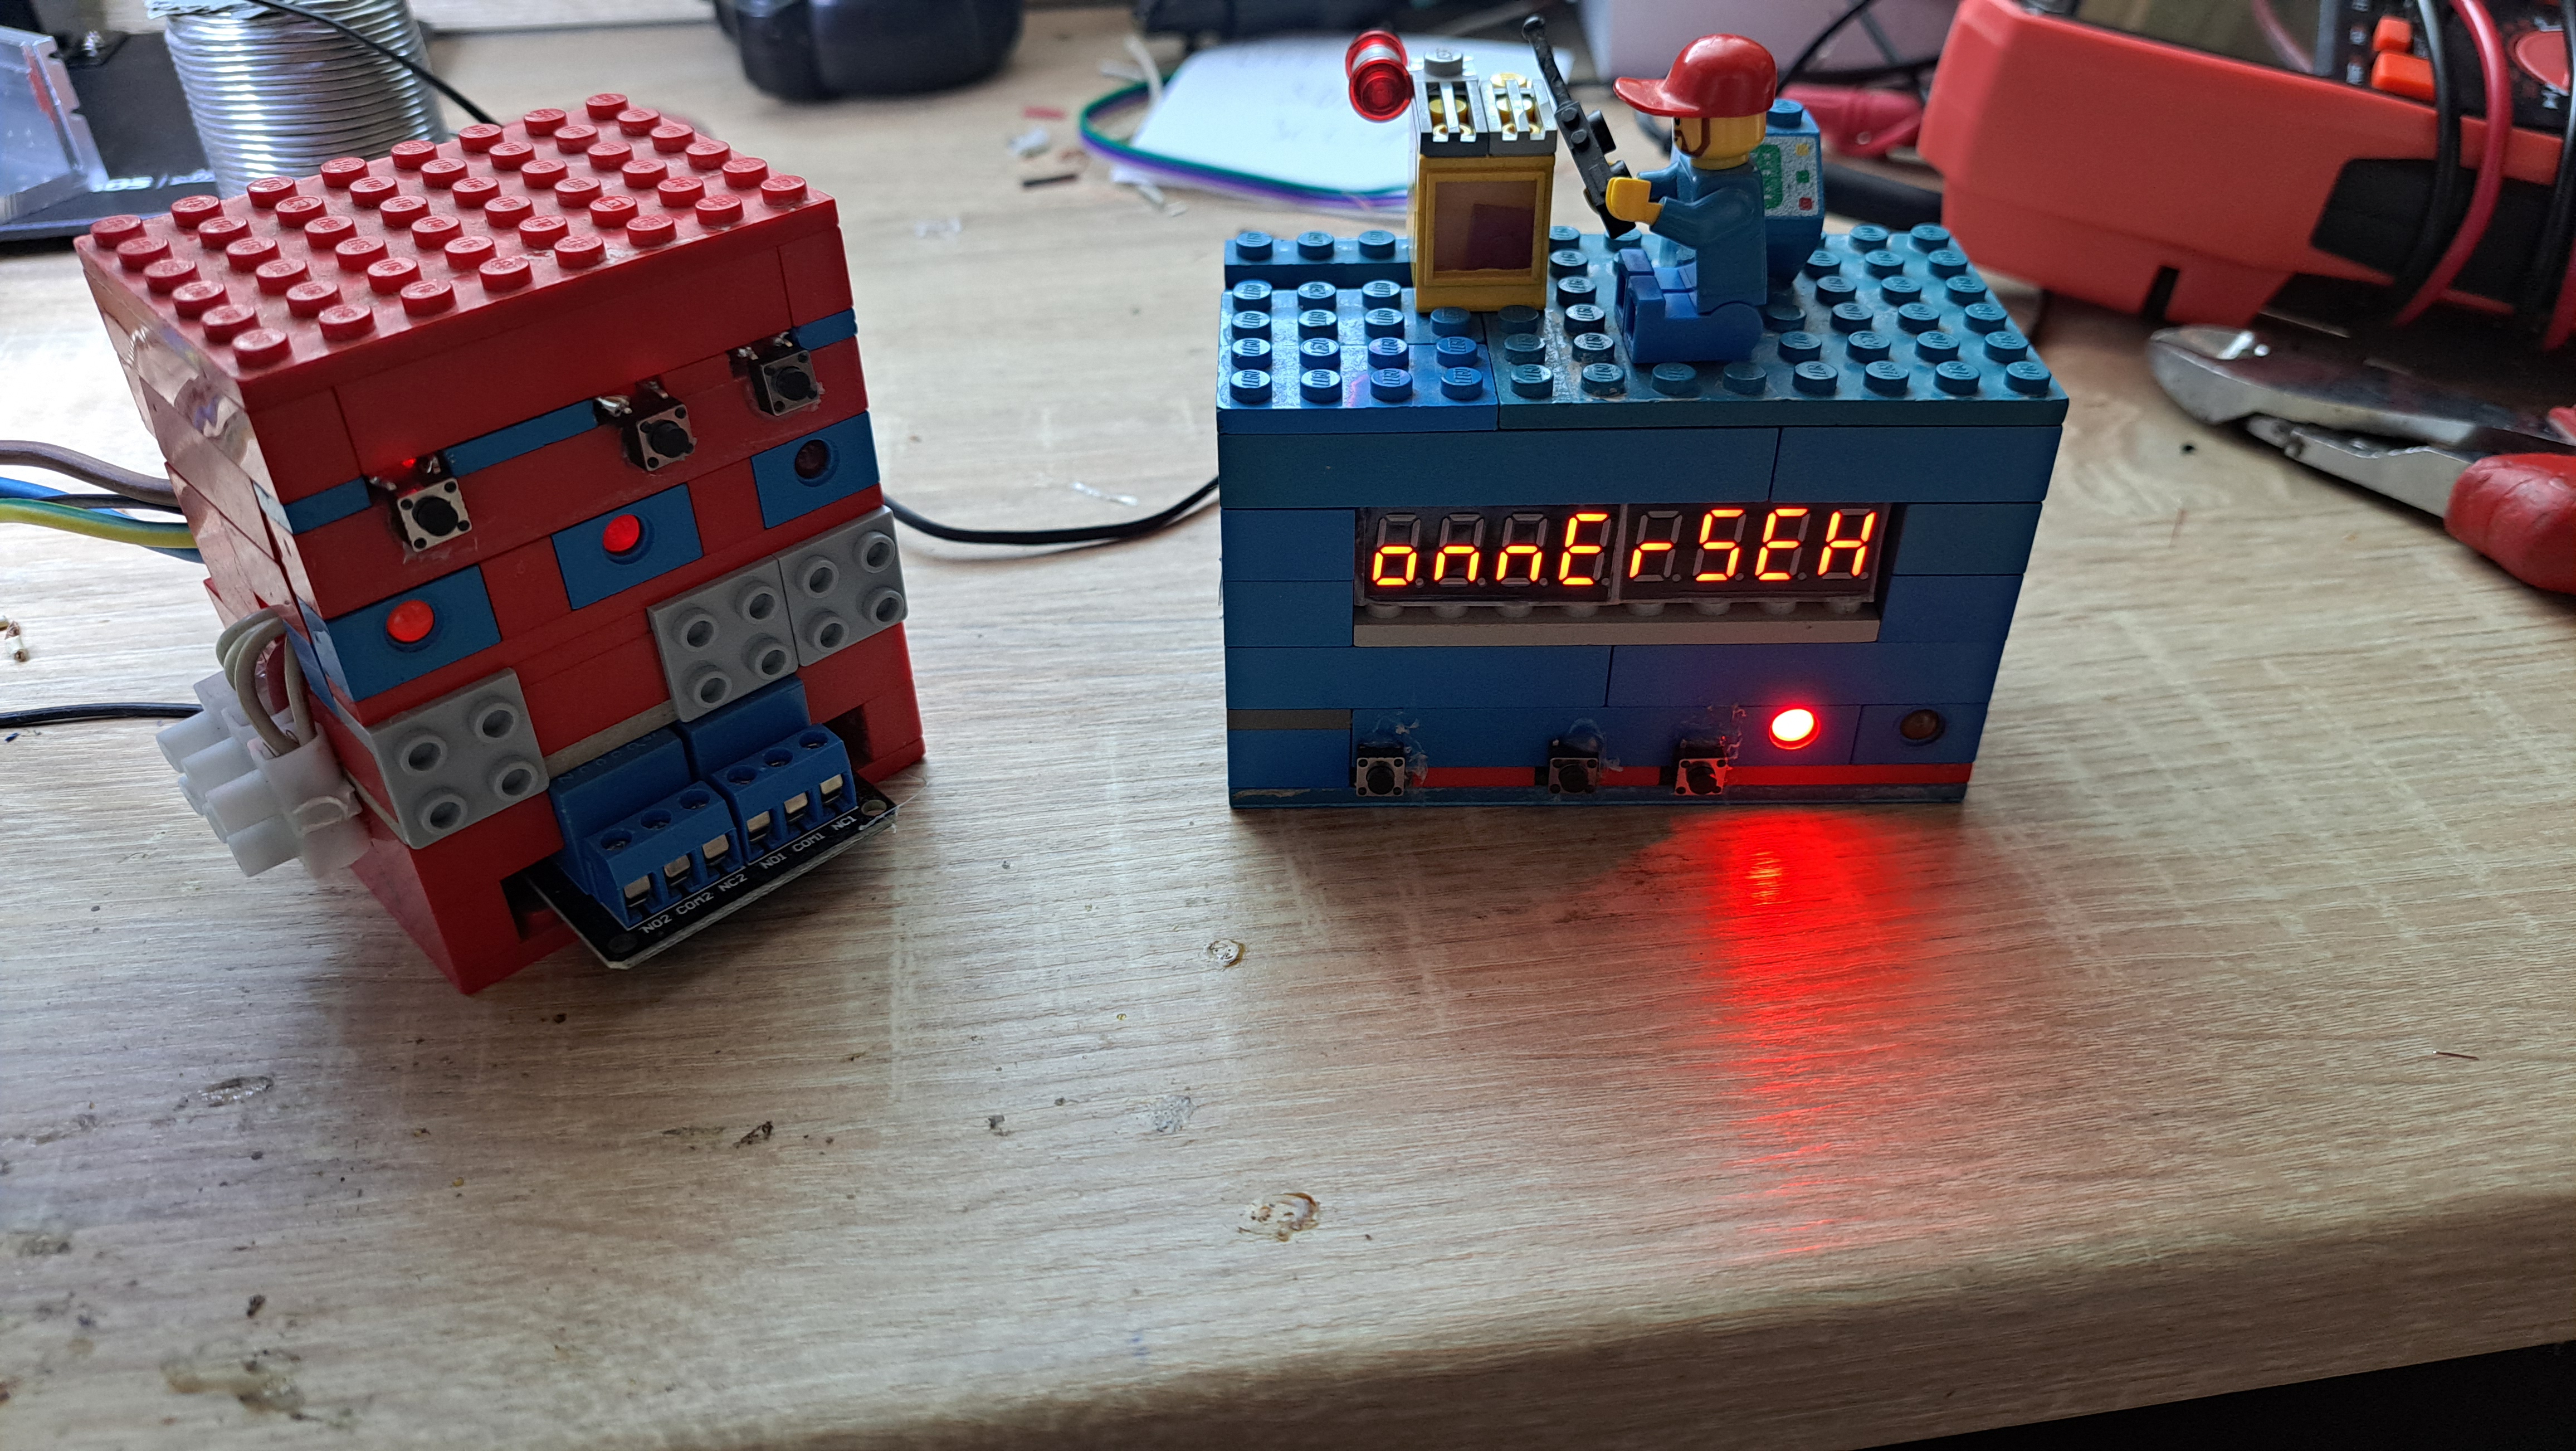
The thermostat's display automatically displays data if you do not touch the device's operating buttons. The displayed values can be scrolled with the arrows. If you are only interested in a single piece of data, press the two modifier buttons at the same time, and the display will only show the menu displayed at that moment.
Menus and Submenus:
- Runs out_in
- In this menu, it is possible to turn the heating off or on. If the heating is off, the boilers will not start even if the temperature drops below the set on the thermostat.
- Hofok for primary boiler
- In this menu, you can set the desired temperature between 0 and 45 degrees Celsius. The thermostat tries to reach the value set here on the PRIMARY set boiler.
- Hofok for secondary boiler
- In this menu, the desired temperature can be set between 0 and the temperature set on the first boiler. The thermostat tries to reach the value set here on the boiler set to SECONDARY.
- Manual mode selection
- Here it is possible to switch on the selected boiler manually. In this case, the automatic switches off, and the selected boiler starts. The boiler will operate until you increase the temperature of the room by one degree Celsius or until the manual mode is stopped.
- Selection of primary boiler
- Here you can choose which boiler you want to choose as primary, the secondary one will be the remaining boiler.
- Select your running mode
- only primary
- In this case, only the primary boiler will operate and will try to maintain the set temperature.
- Auto1
- Try to heat the room with the primary boiler until the temperature set on the secondary boiler drops below the temperature. In which case the primary one is switched off, and the secondary boiler is switched on, which operates until the temperature set for the secondary boiler is reached, and then turns on the primary one again and tries to heat it up to the temperature set on the primary boiler.
- Auto2
- It tries to heat up with the primary boiler until the temperature falls below the temperature set on the secondary boiler. Then it tries to heat up with the secondary boiler to the temperature set for the primary boiler, from where it tries to continue heating with the primary boiler again.
- Auto3
- Try to heat the room with the primary boiler. However, if the temperature falls a full degree below the set value and the primary one cannot heat the house, the secondary one will be turned on until it reaches the temperature set by the primary one. (This mode tries to keep the primary set value by using any boiler)
- only primary
The boiler controller
- This unit is responsible for measuring the temperature of the boiler and the water tank, as well as turning the boilers off and on.
- The boiler controller is in continuous contact with the thermostat, and if this connection is interrupted for some reason, the boilers are switched off and the yellow LED on the left starts to flash. In which case, it is not possible to turn on the boiler manually, but the connection between the thermostat and the controller must be restored.
Buttons and Their Functions:
- With this, you can turn on the machine or turn off the heating completely. If no LED lights up on the device, it means that the heating is off. If you want to turn it on, you have to press this button.
- The second button switches to manual mode and turns on the combination boiler, in which case the thermostat measures the current temperature and heats one degree warmer than that, then switches back to automatic mode.
- The third button has the same function as the second, only it switches on the gas boiler.
The two boilers cannot be started at the same time, and it is not possible to switch the boilers on permanently manually. The values converted here can also be modified in the thermostat's menu.
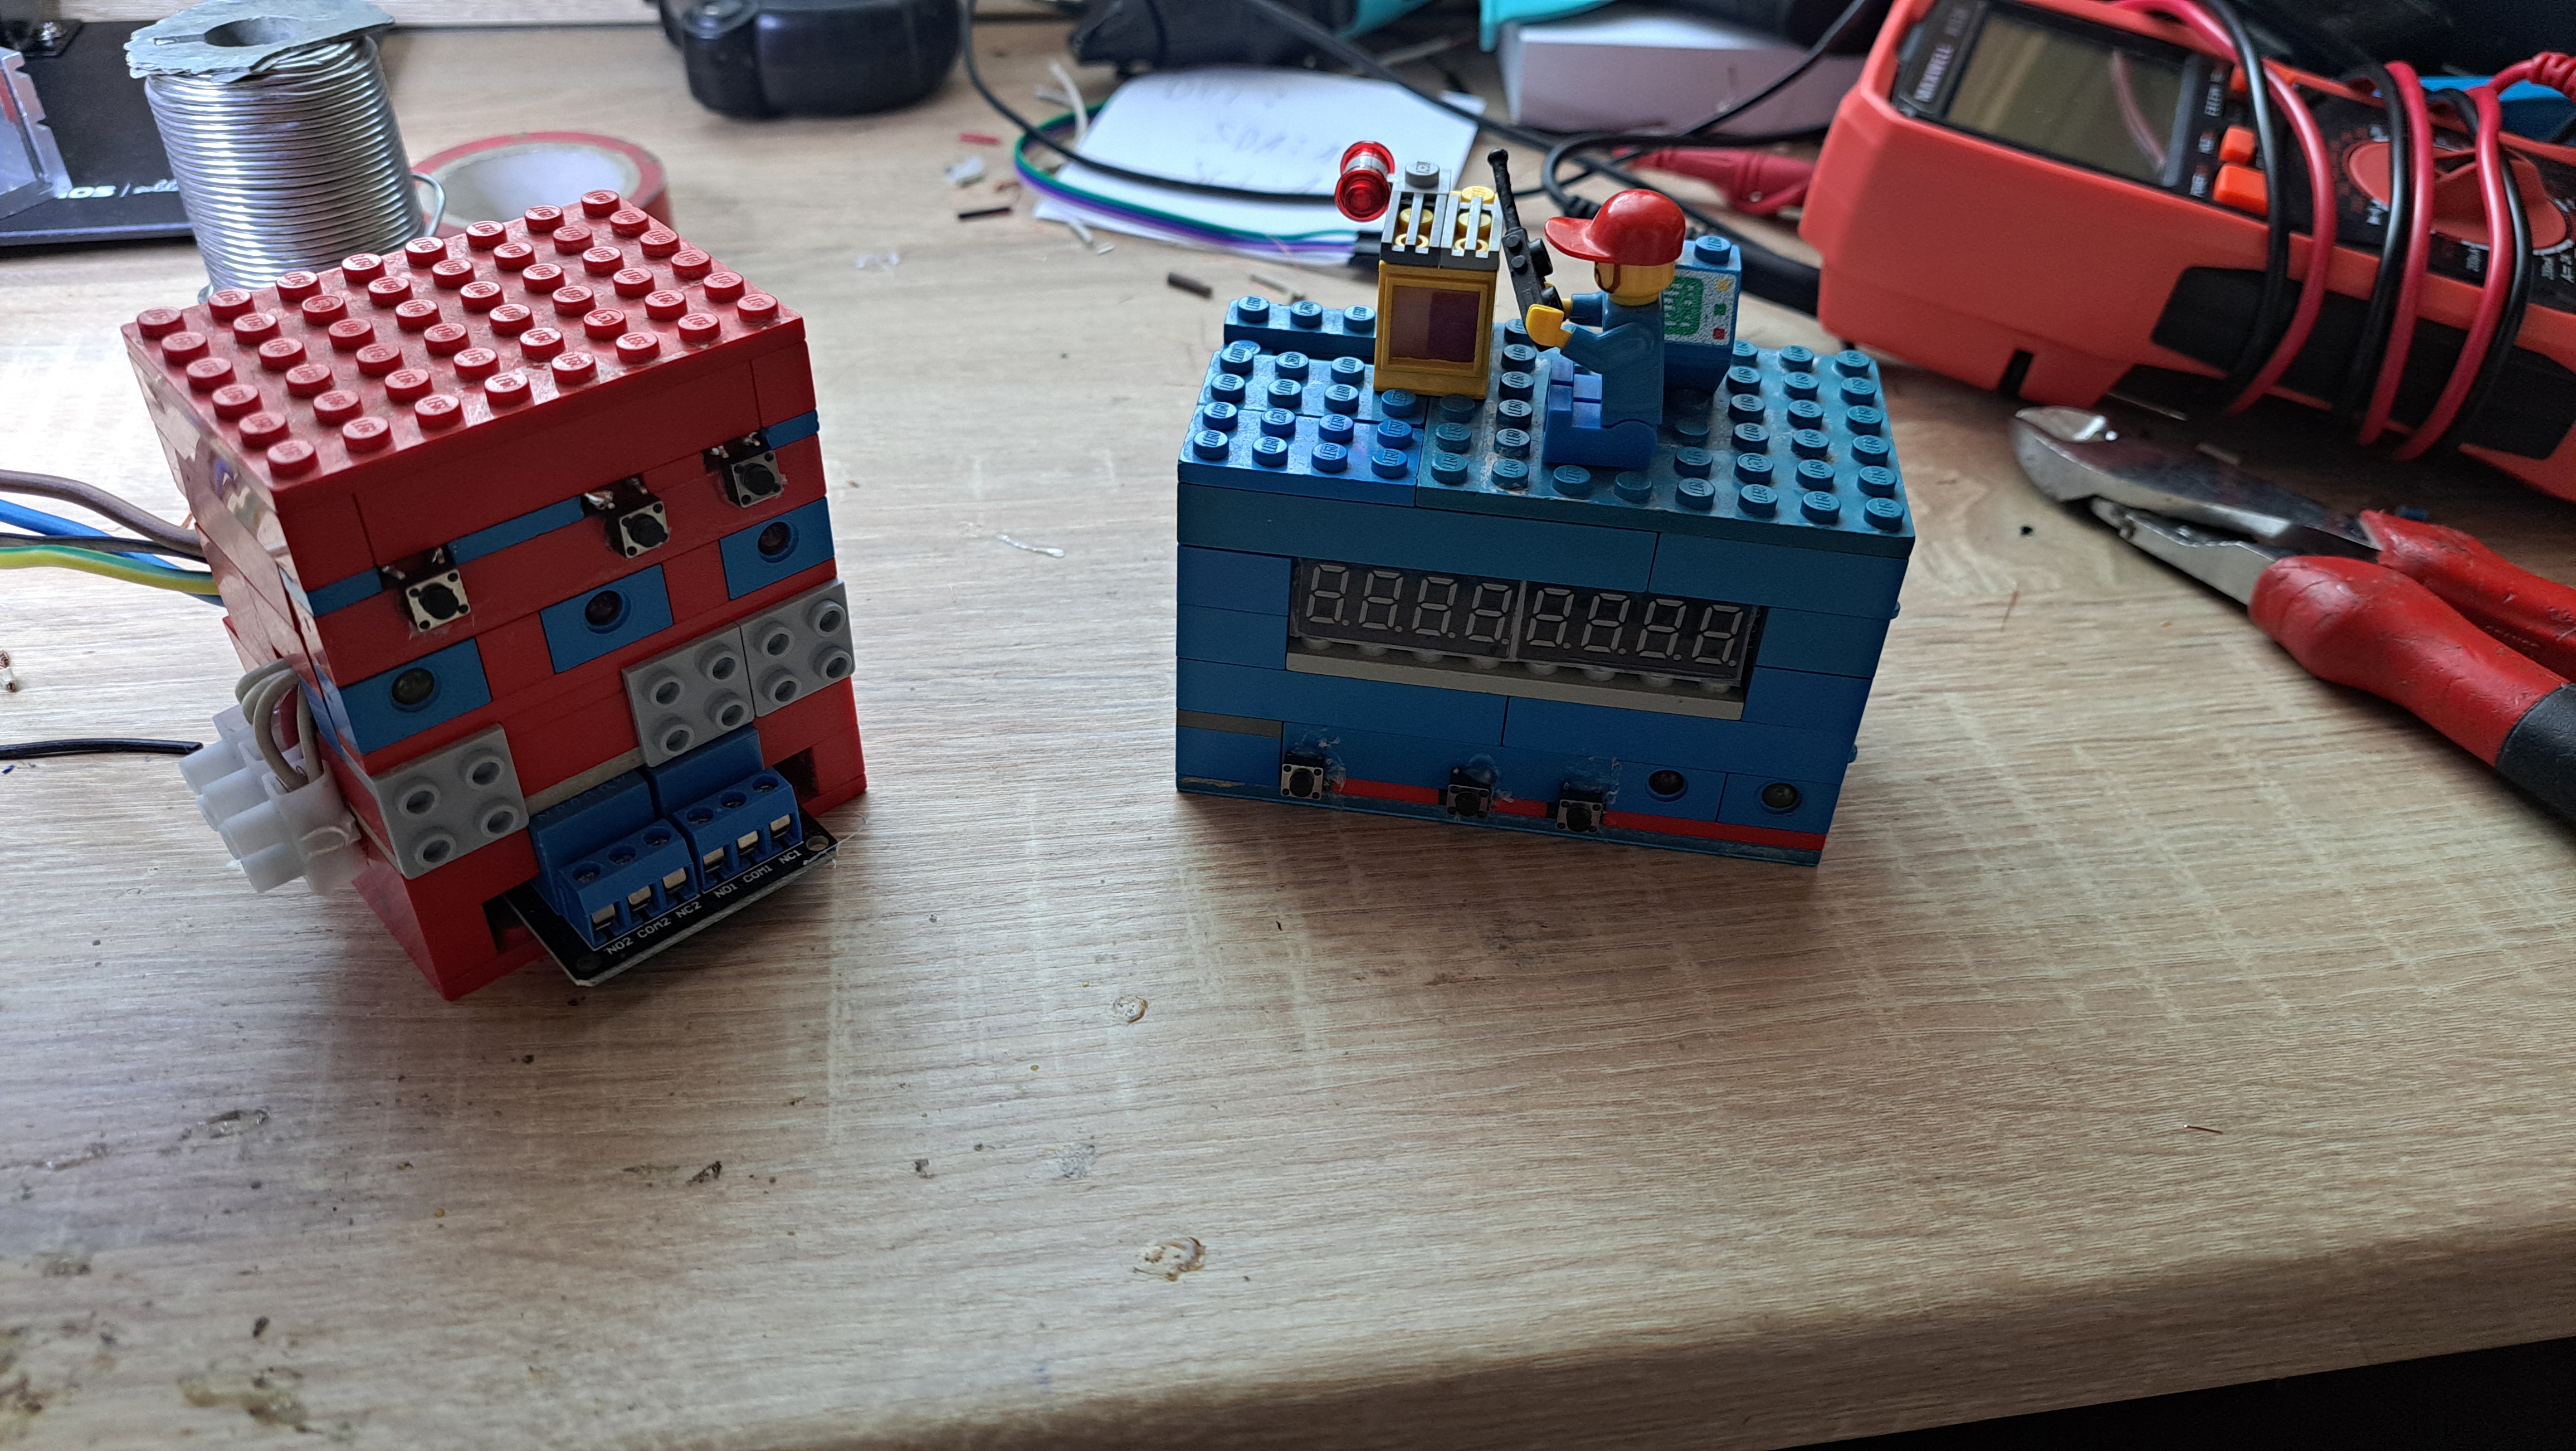
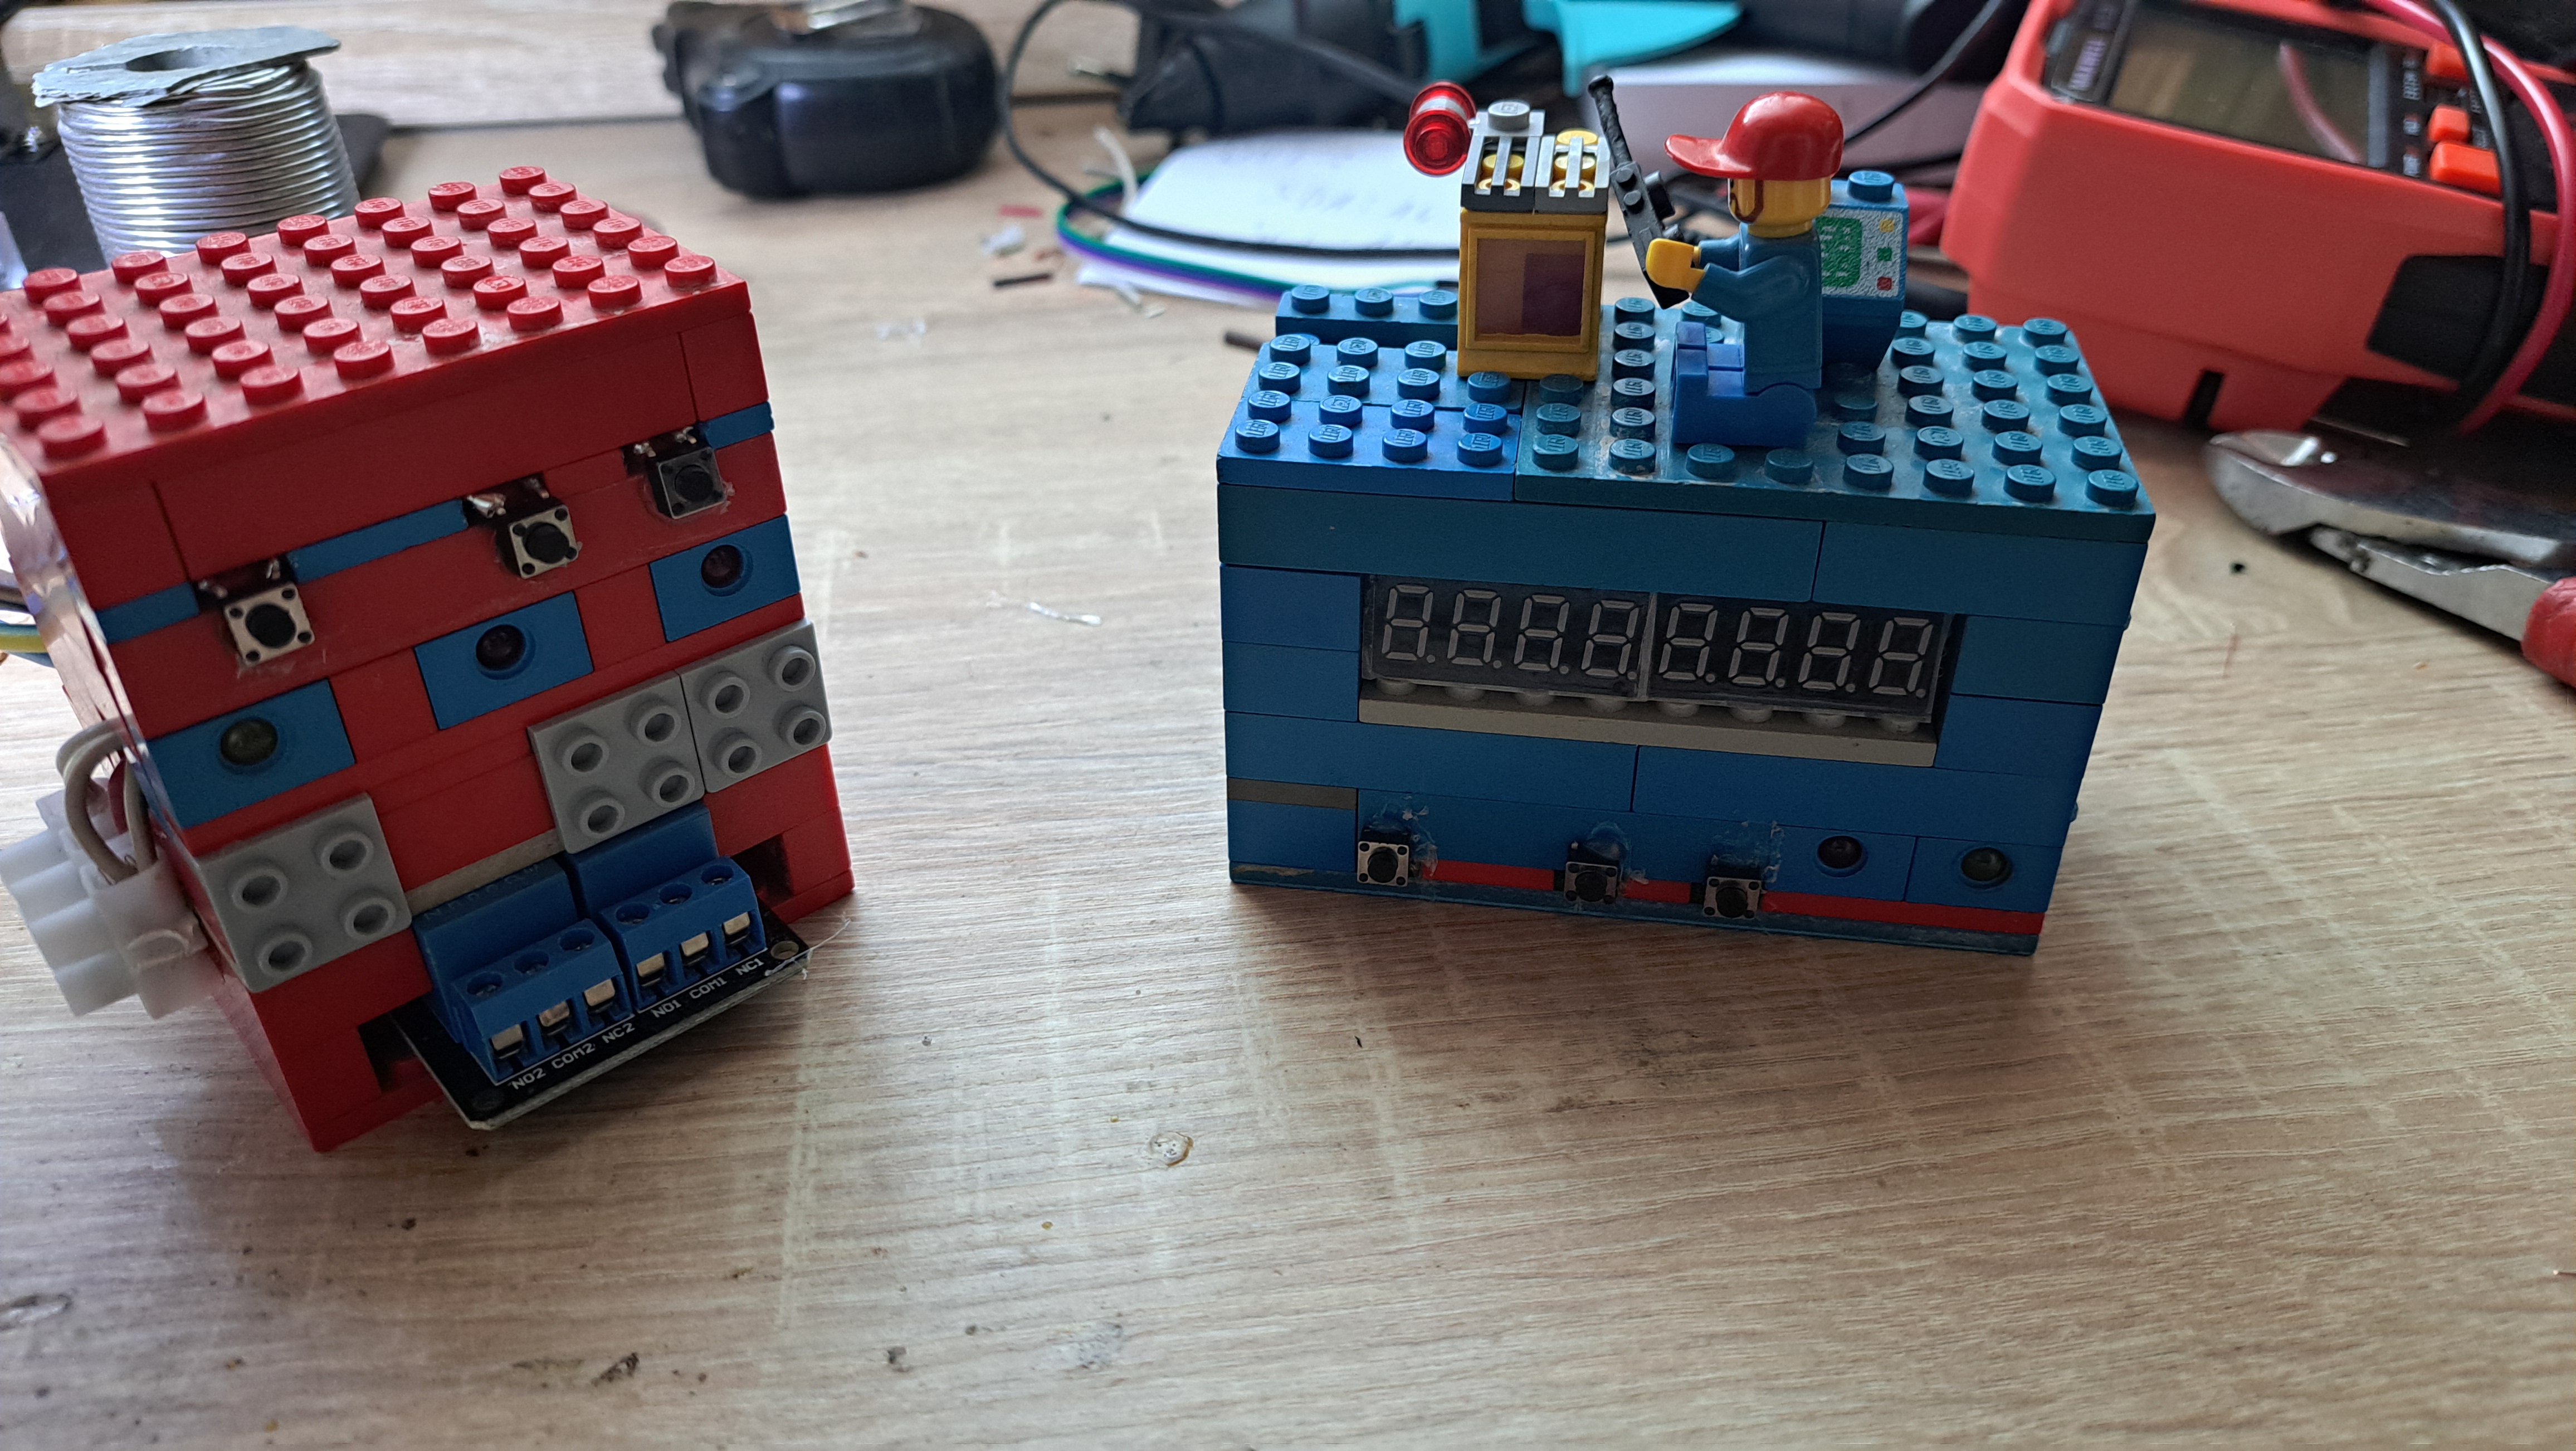
The outer look of the thermostat
This is the two main unit each of them contains a microcontroller, and the two computers are connected to each other via UARTR connection
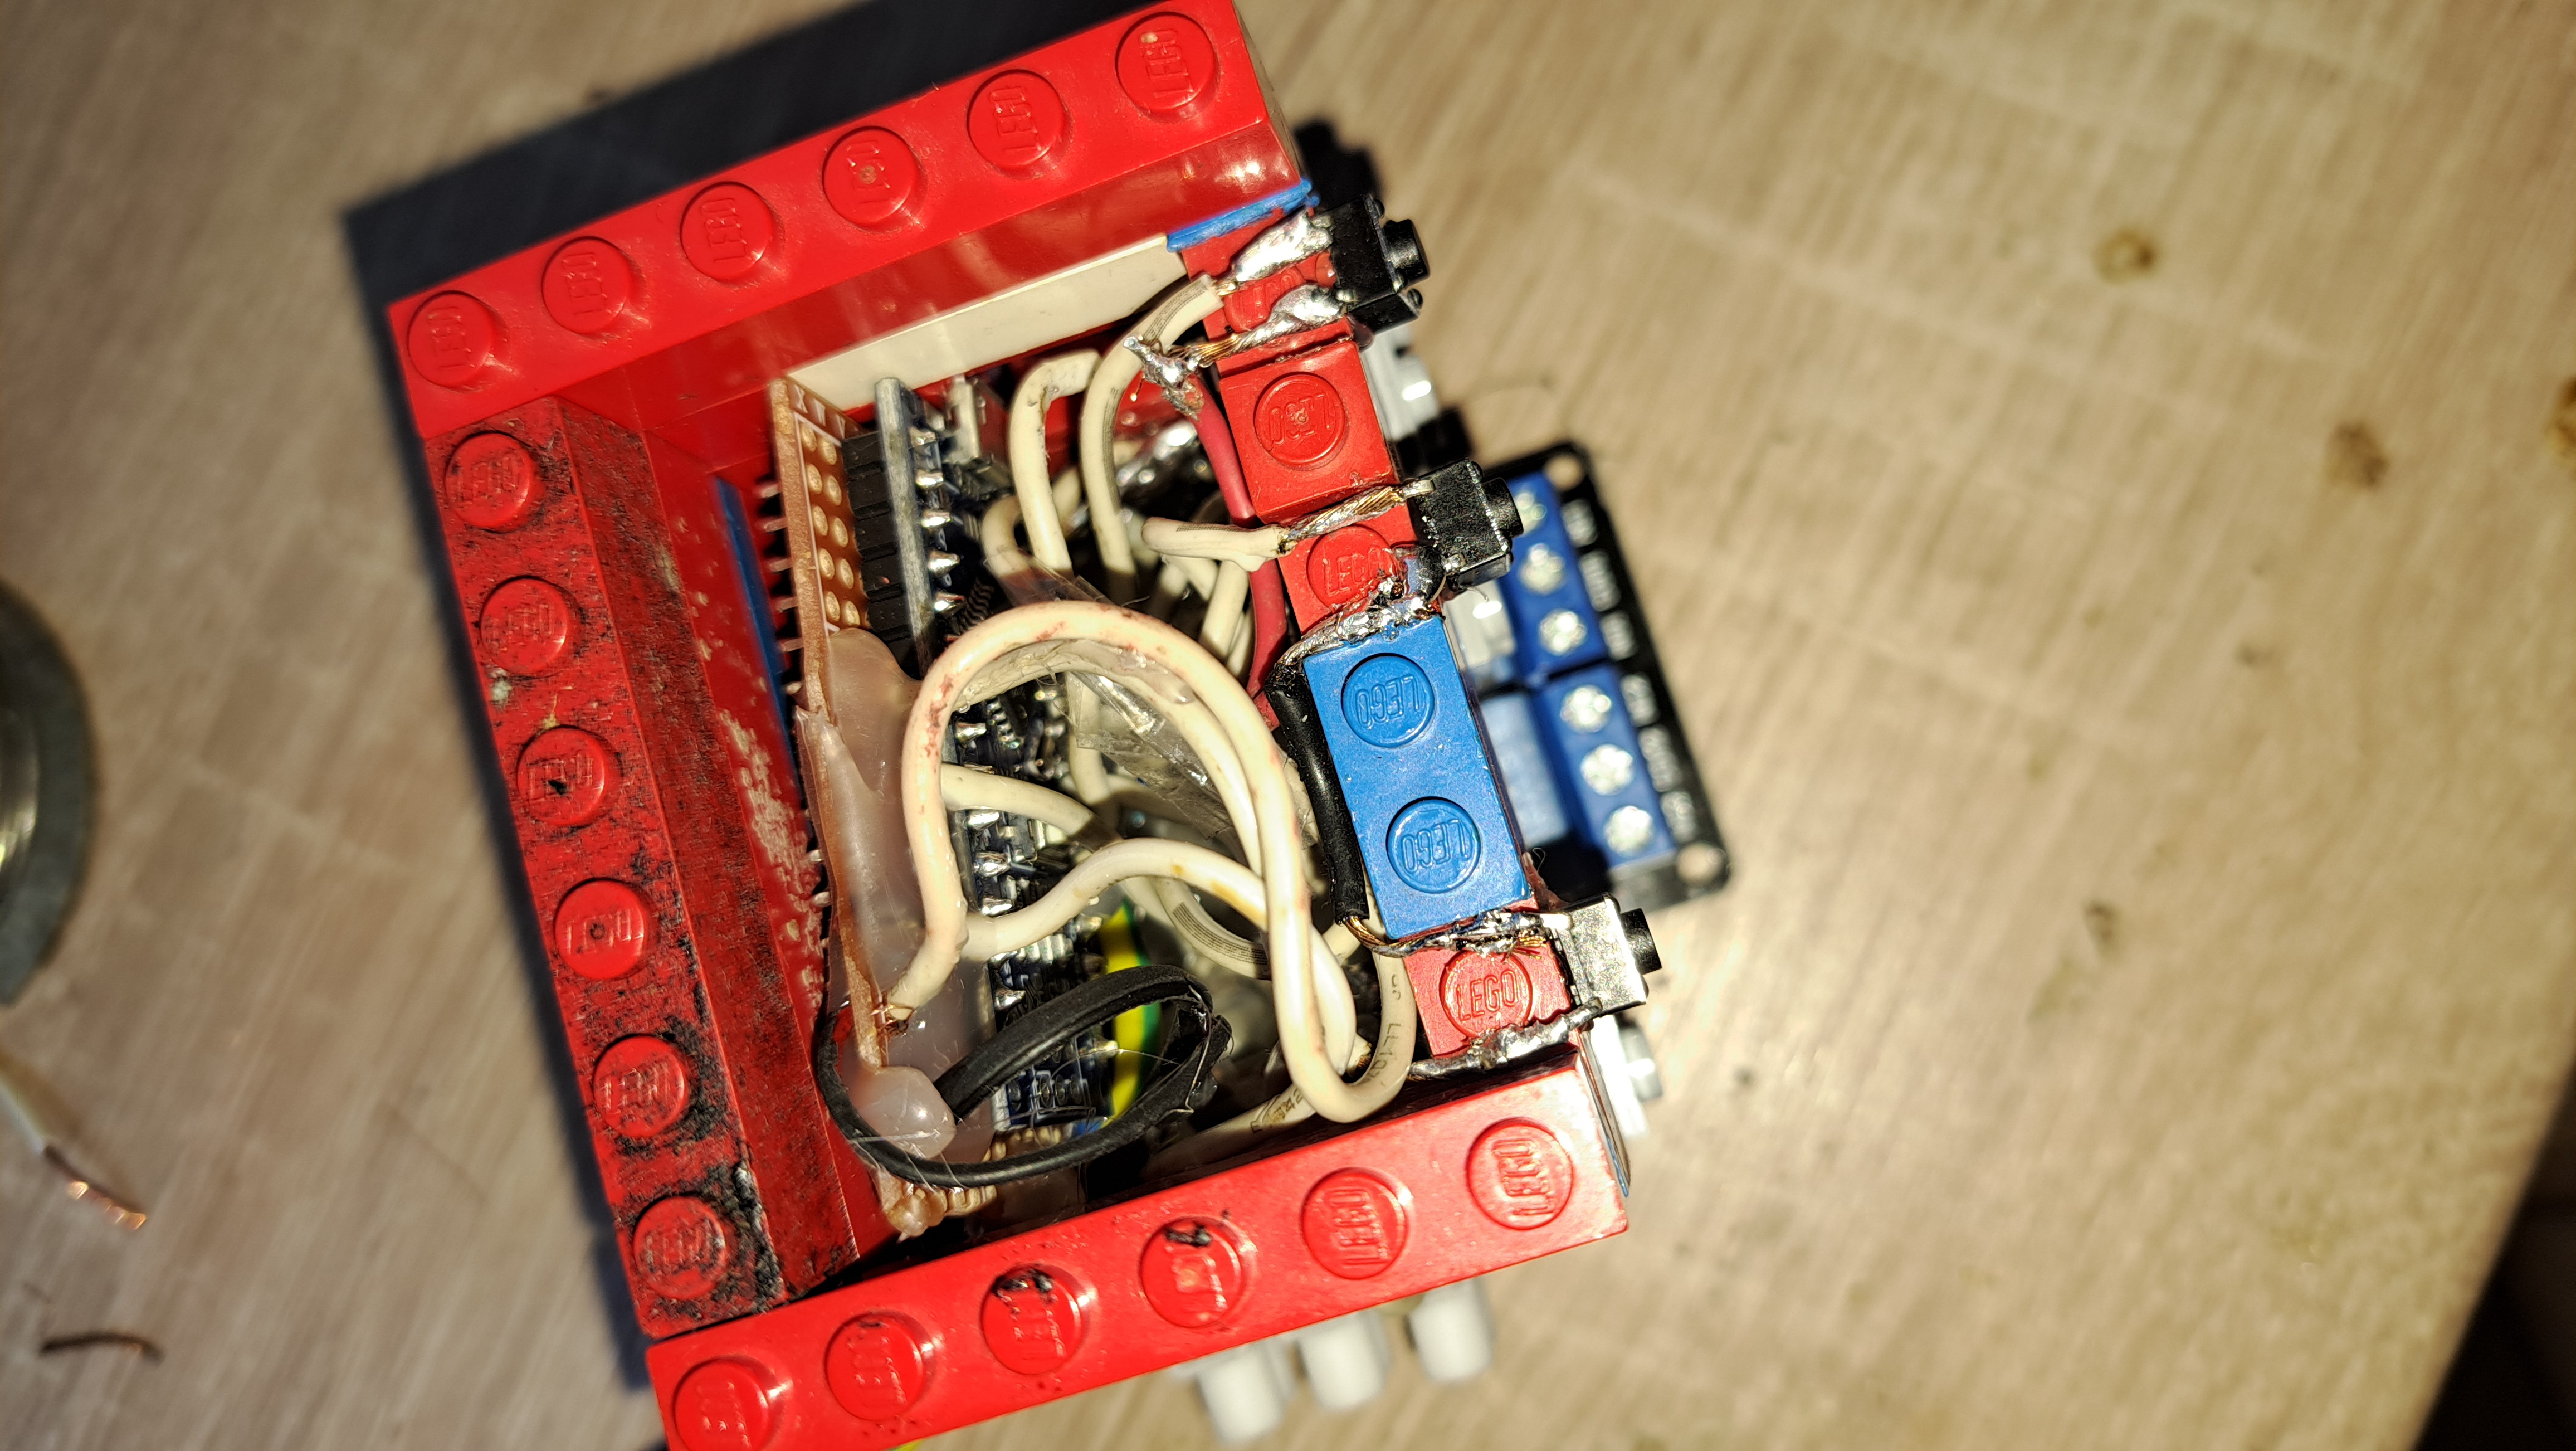
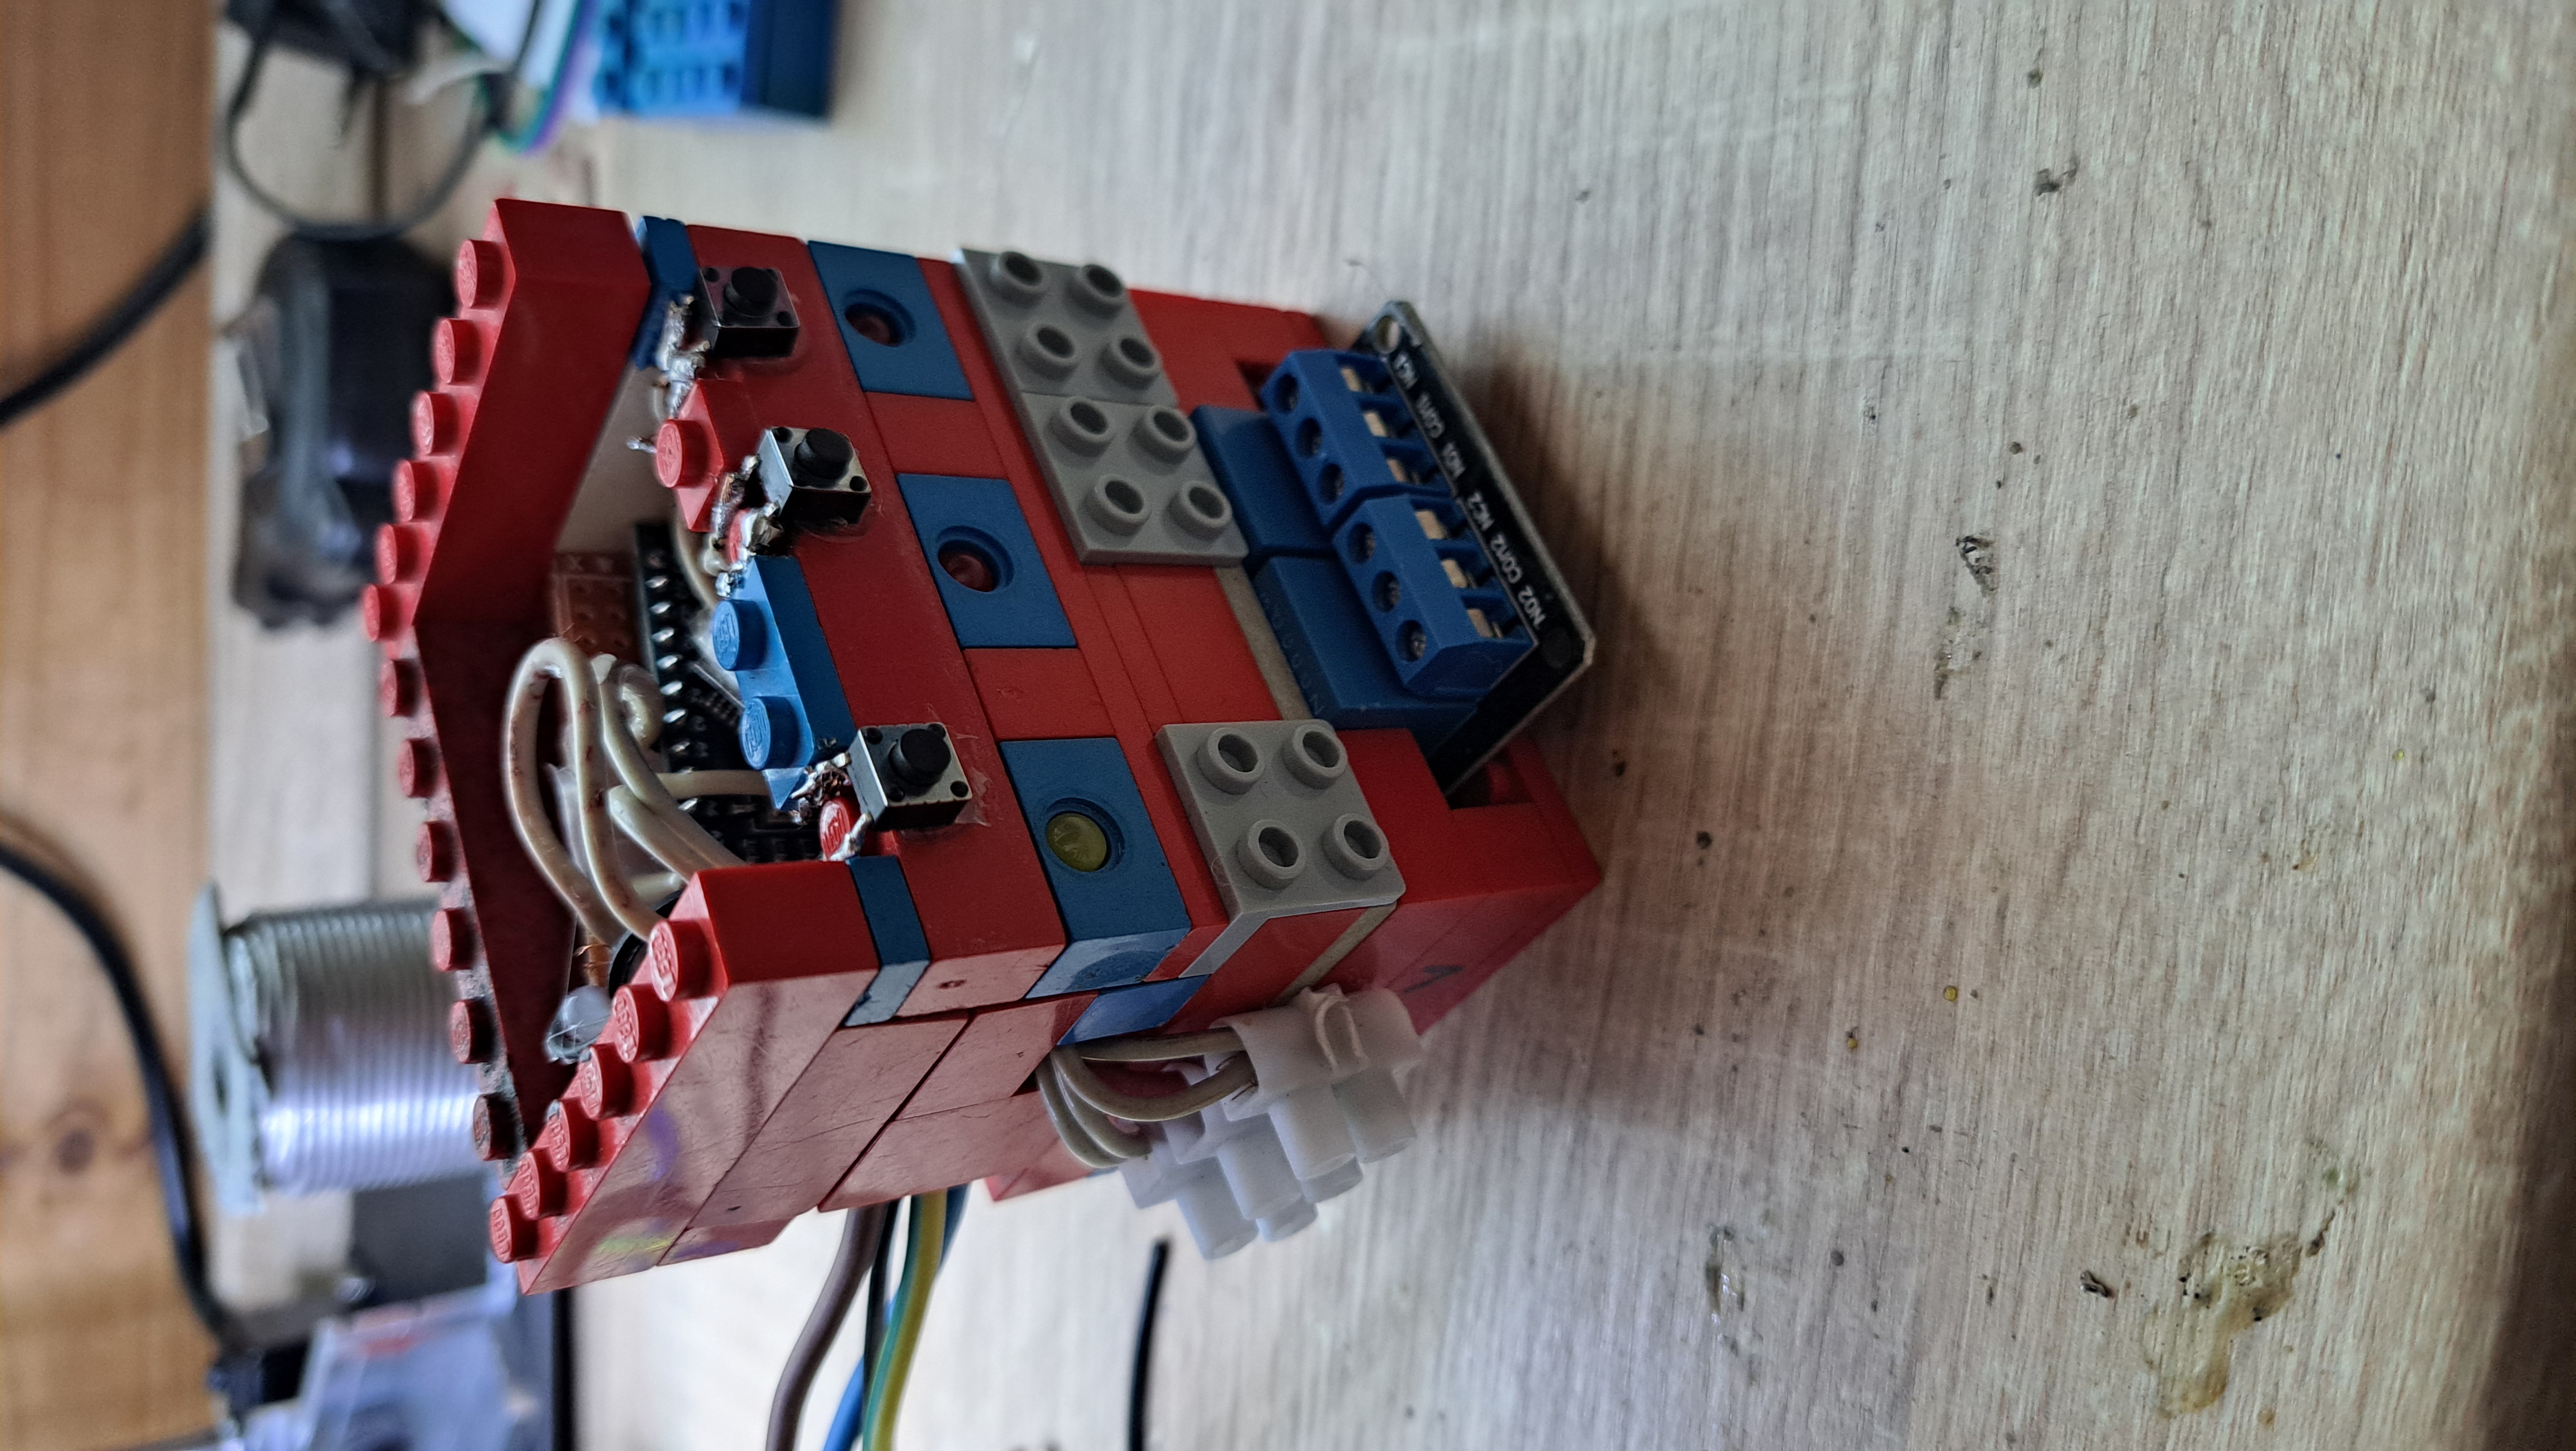
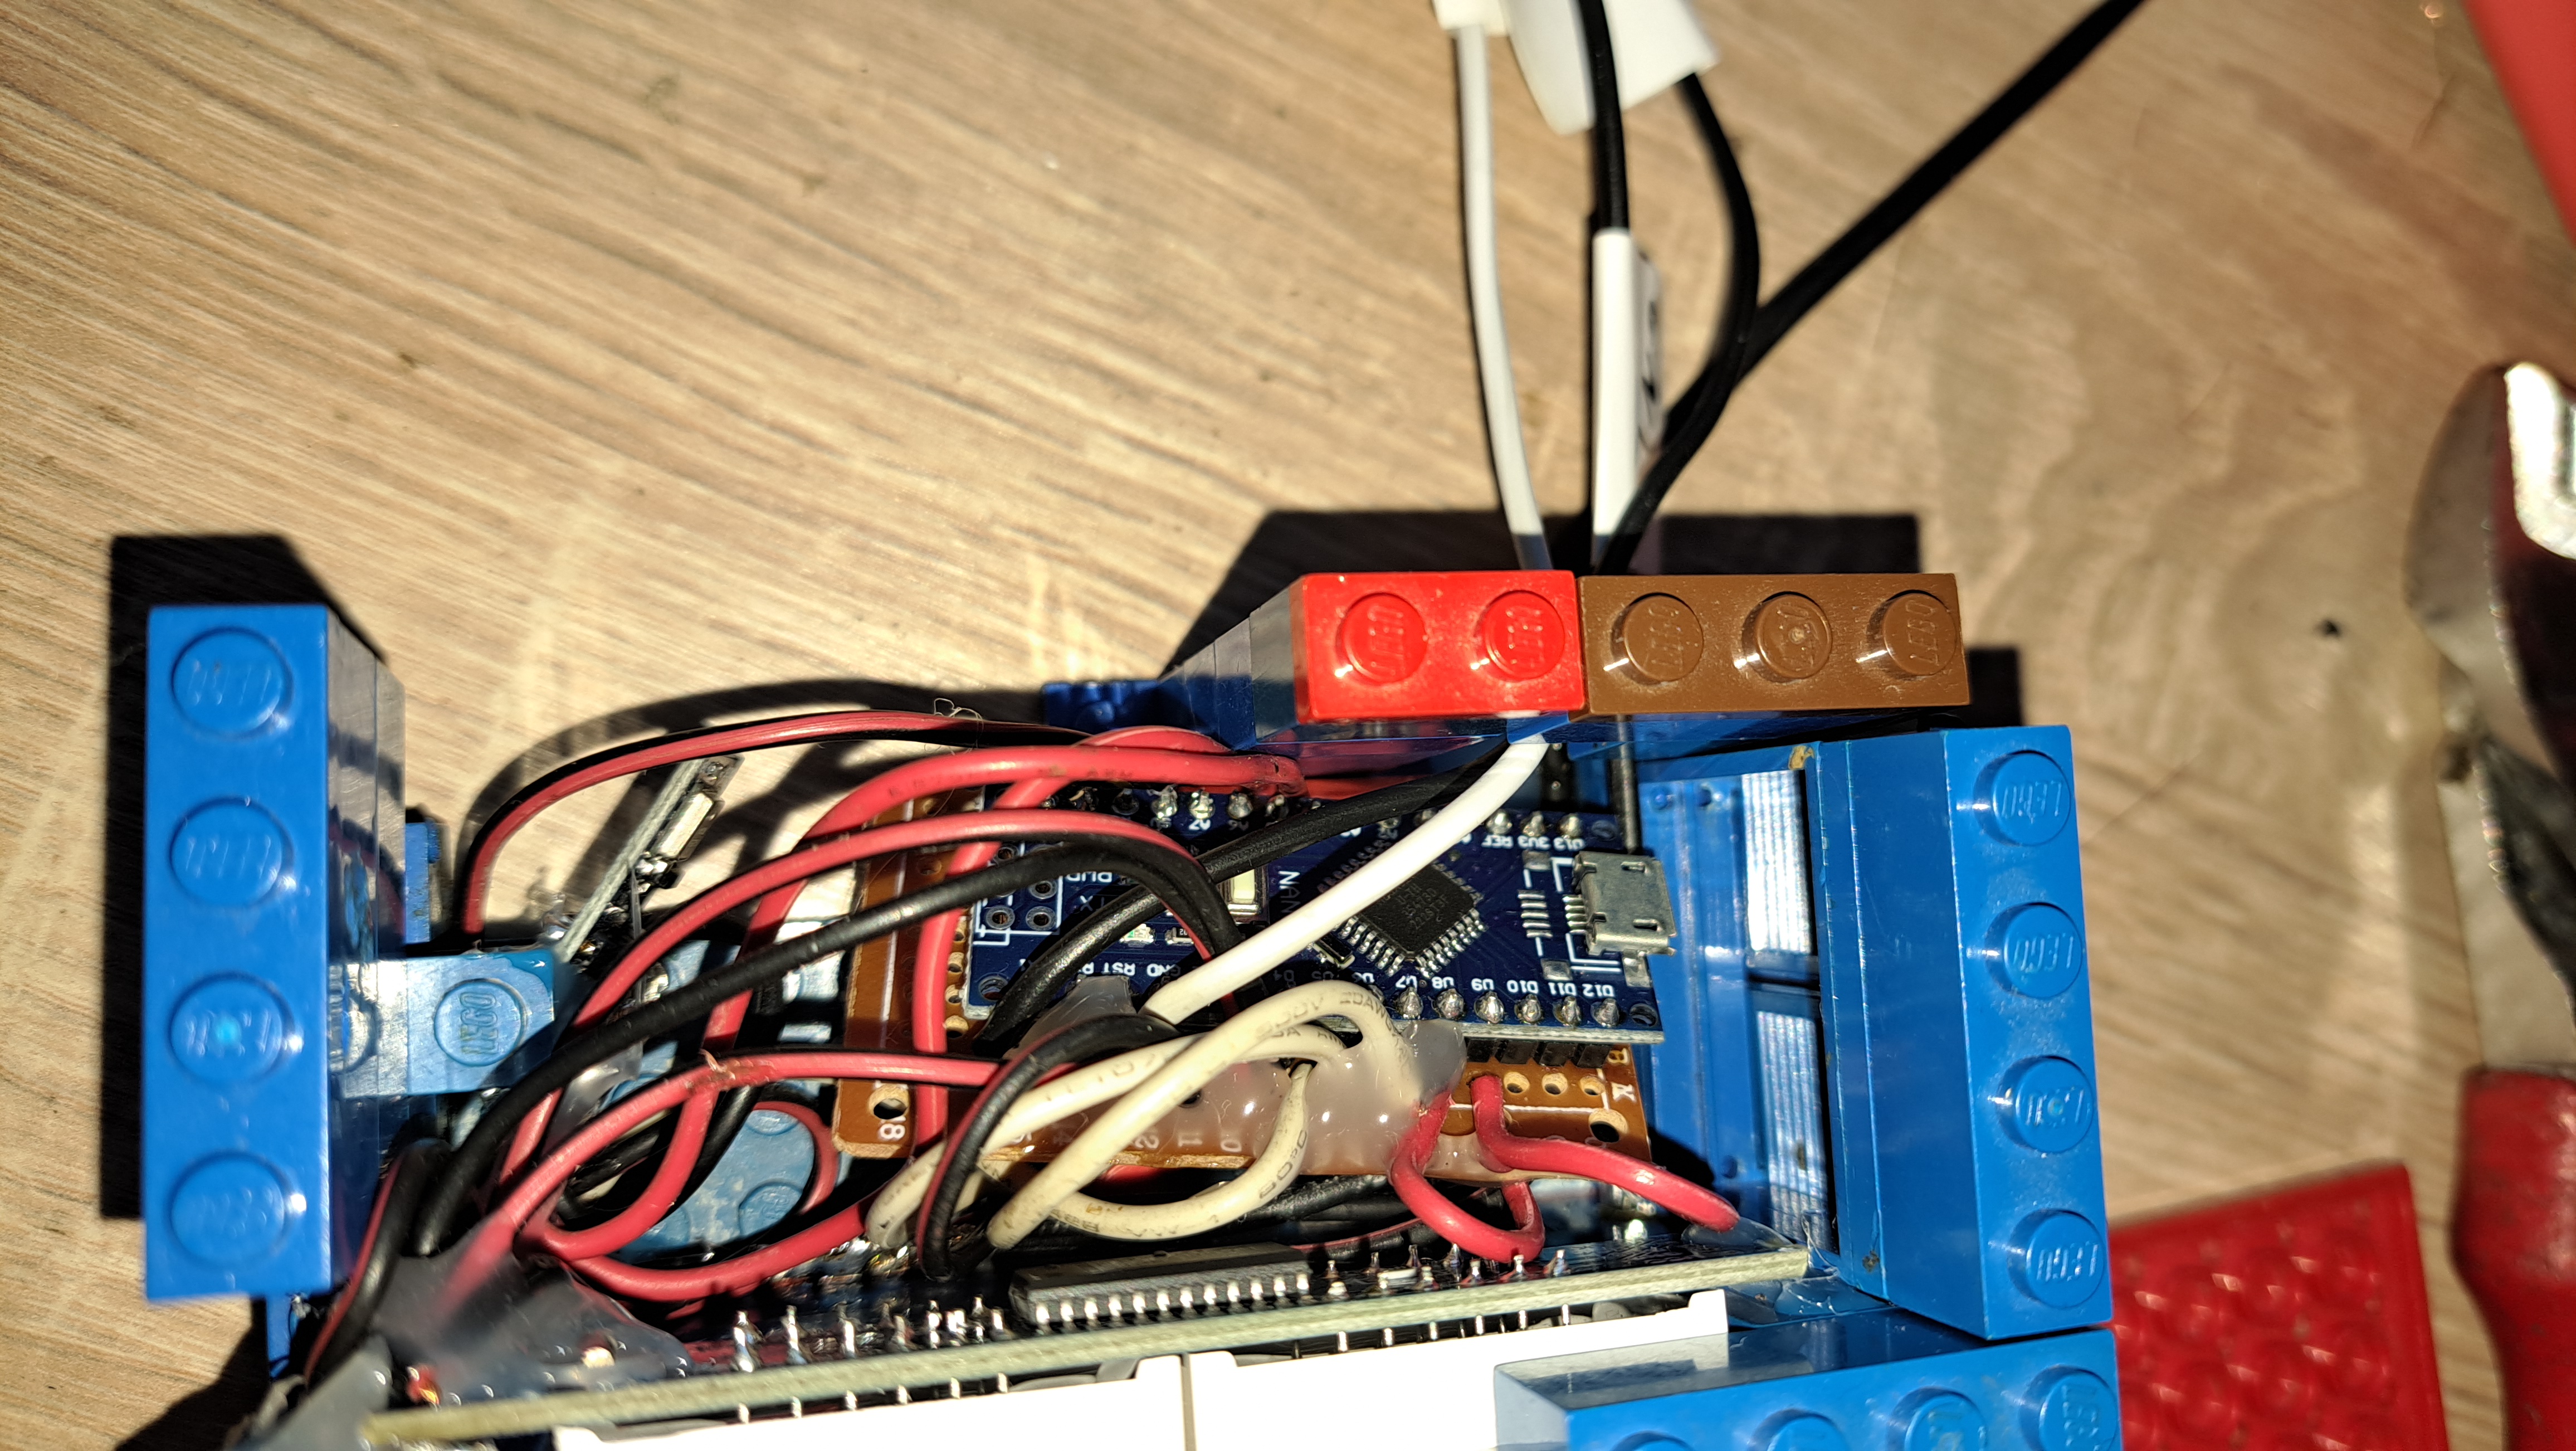
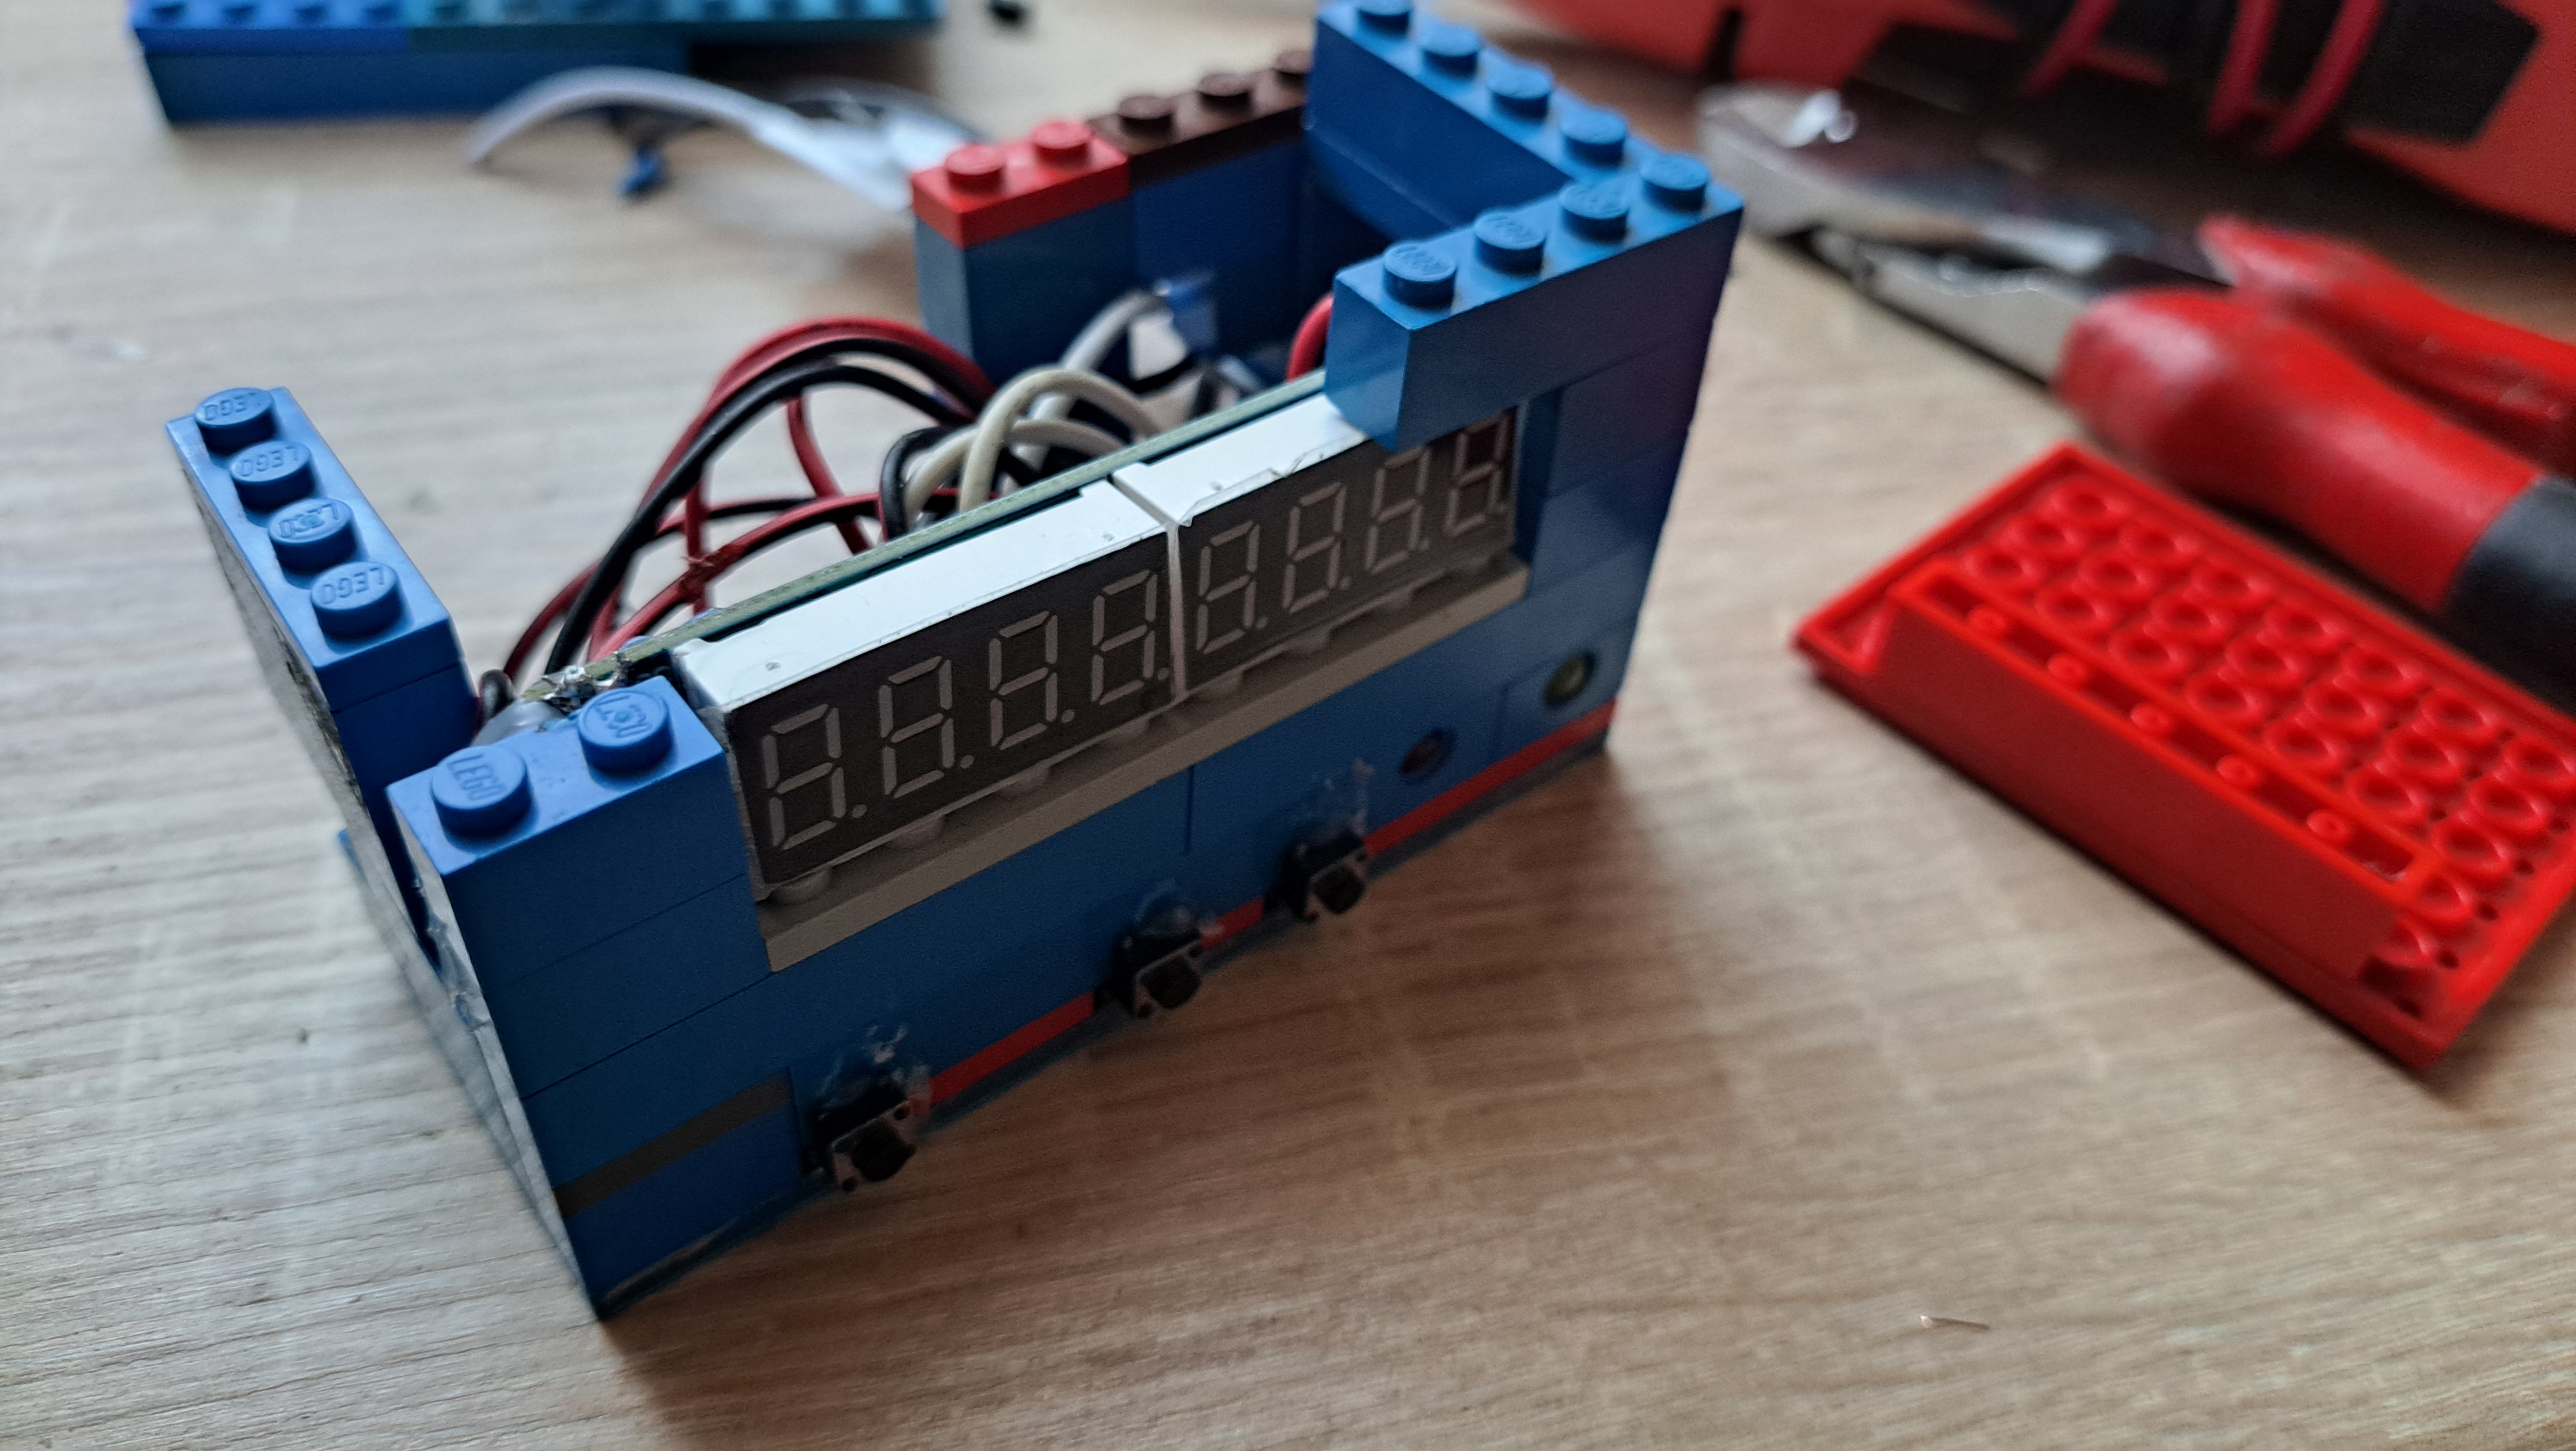
The inside of the units
Everything in the inside is soldered together, and I put a hot glue layer over the connections to make them permanent, and reliable
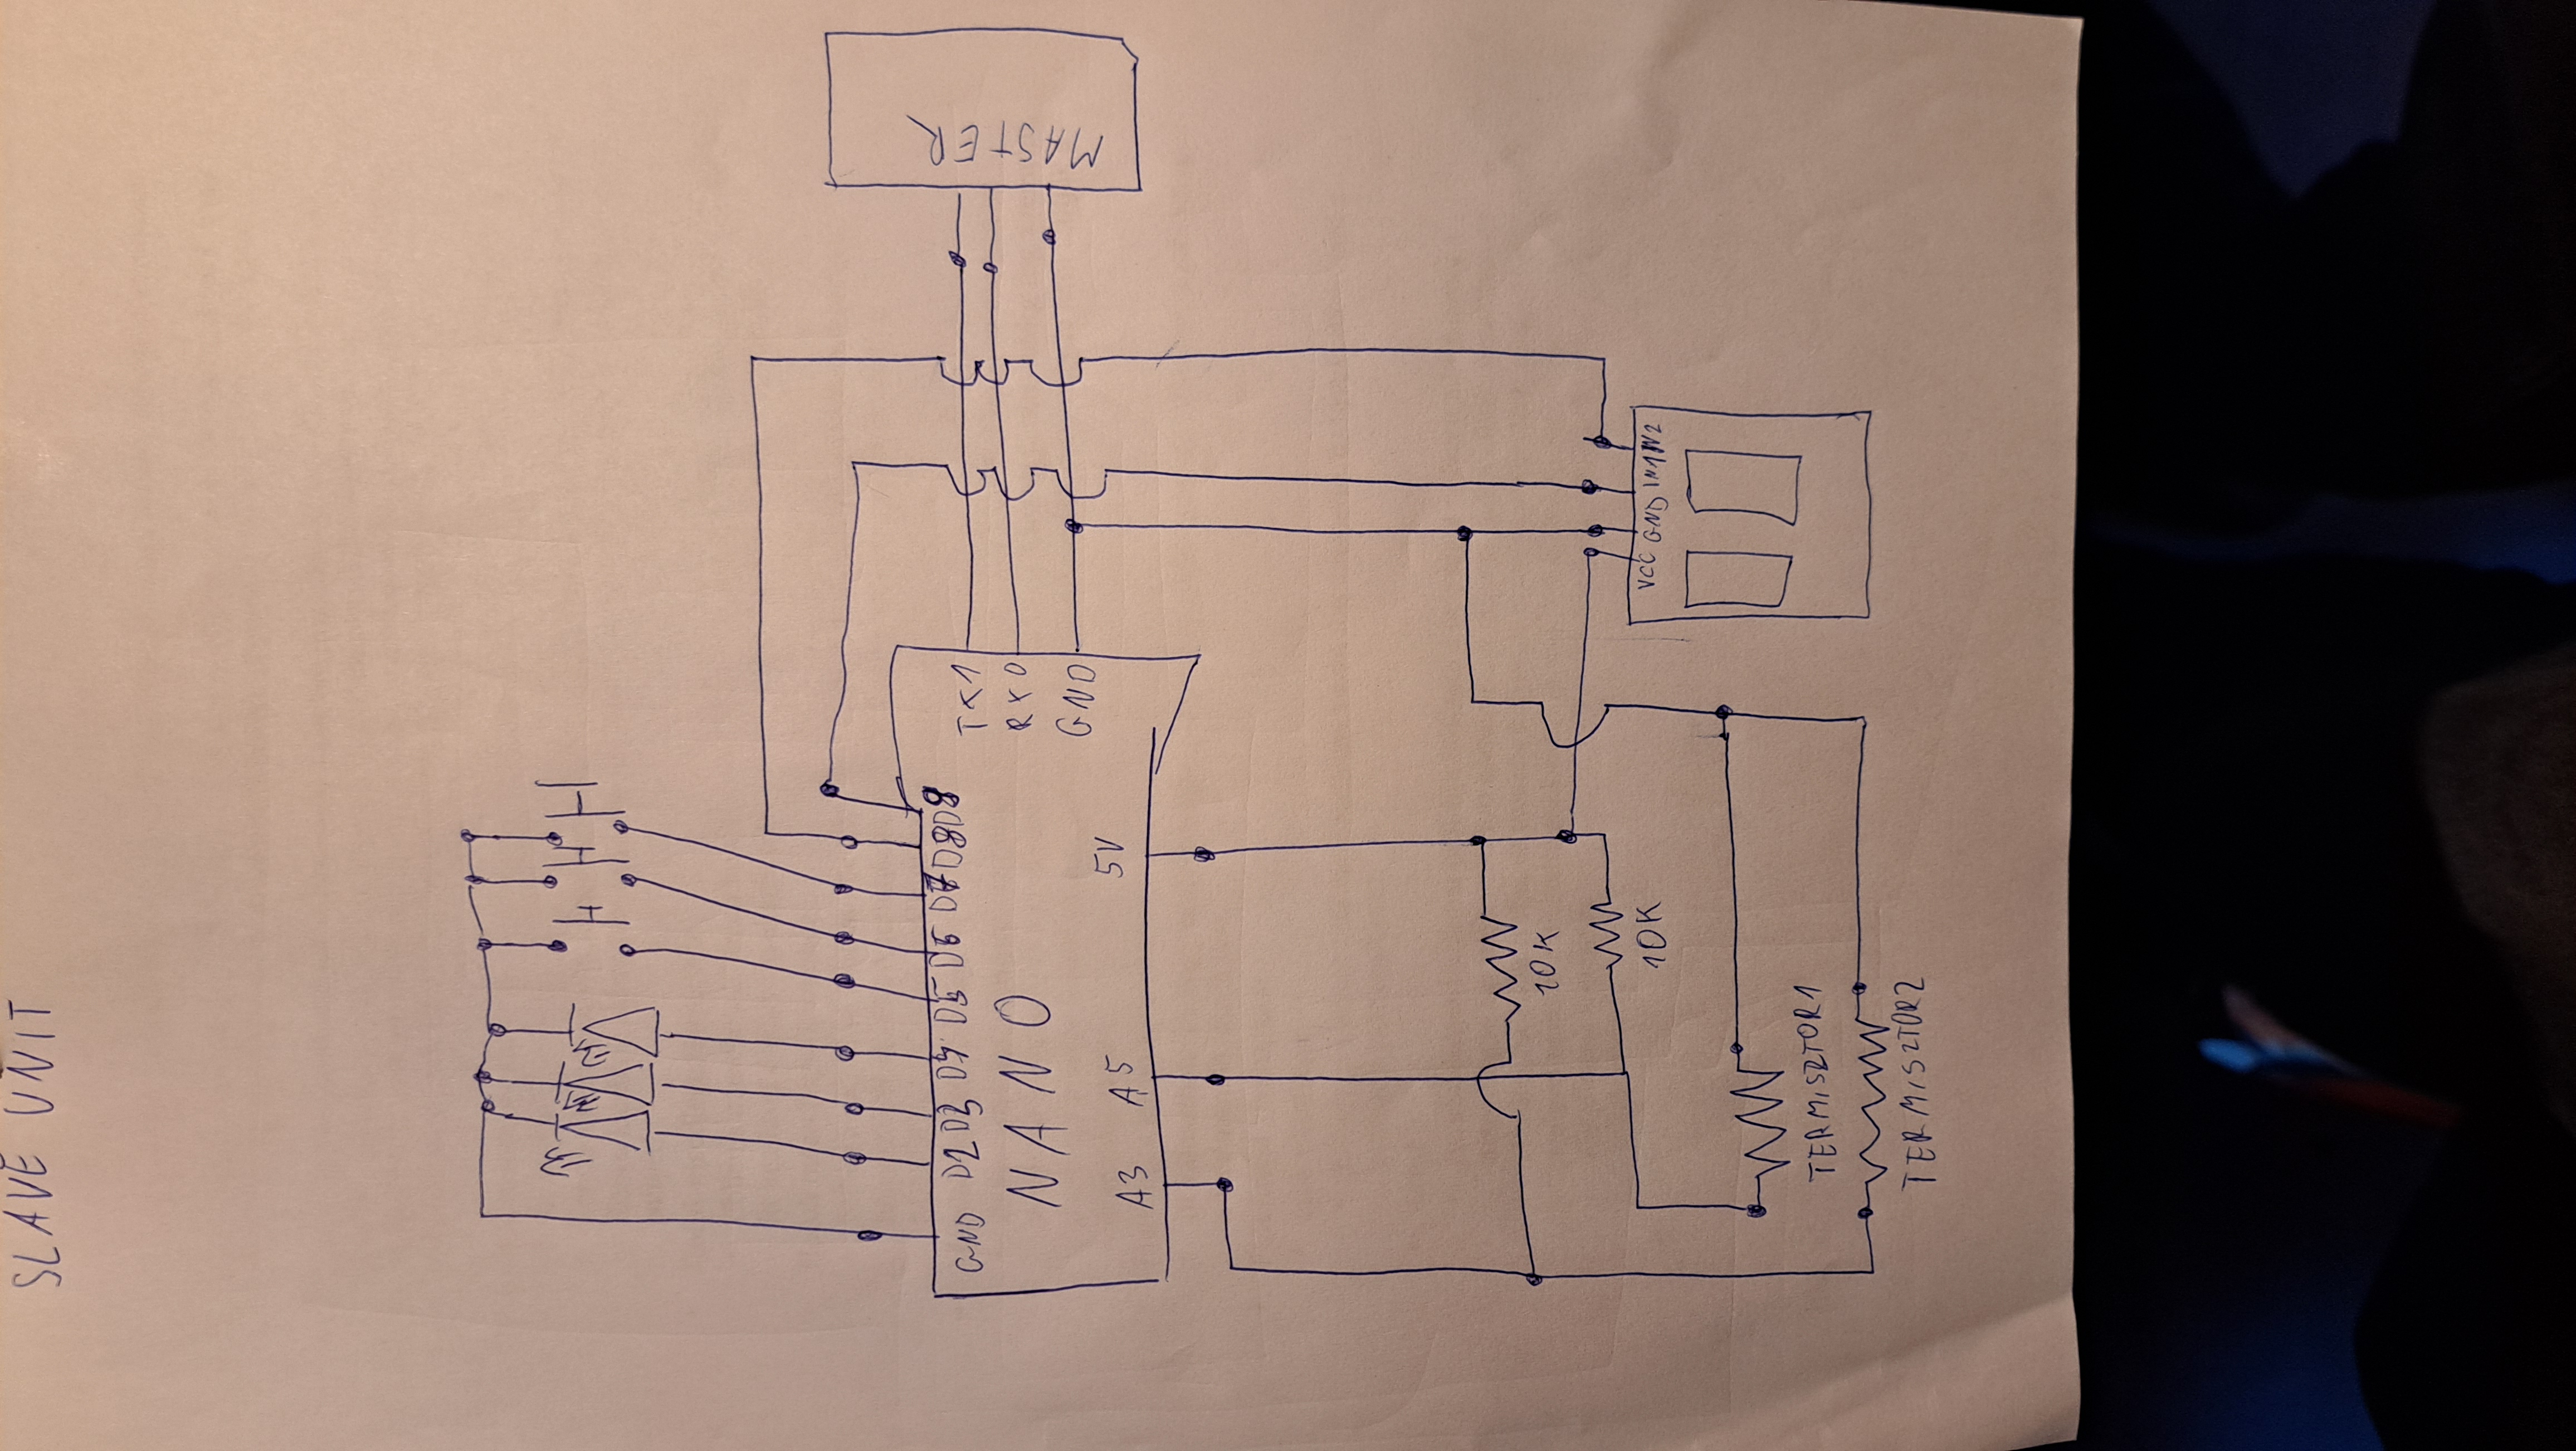
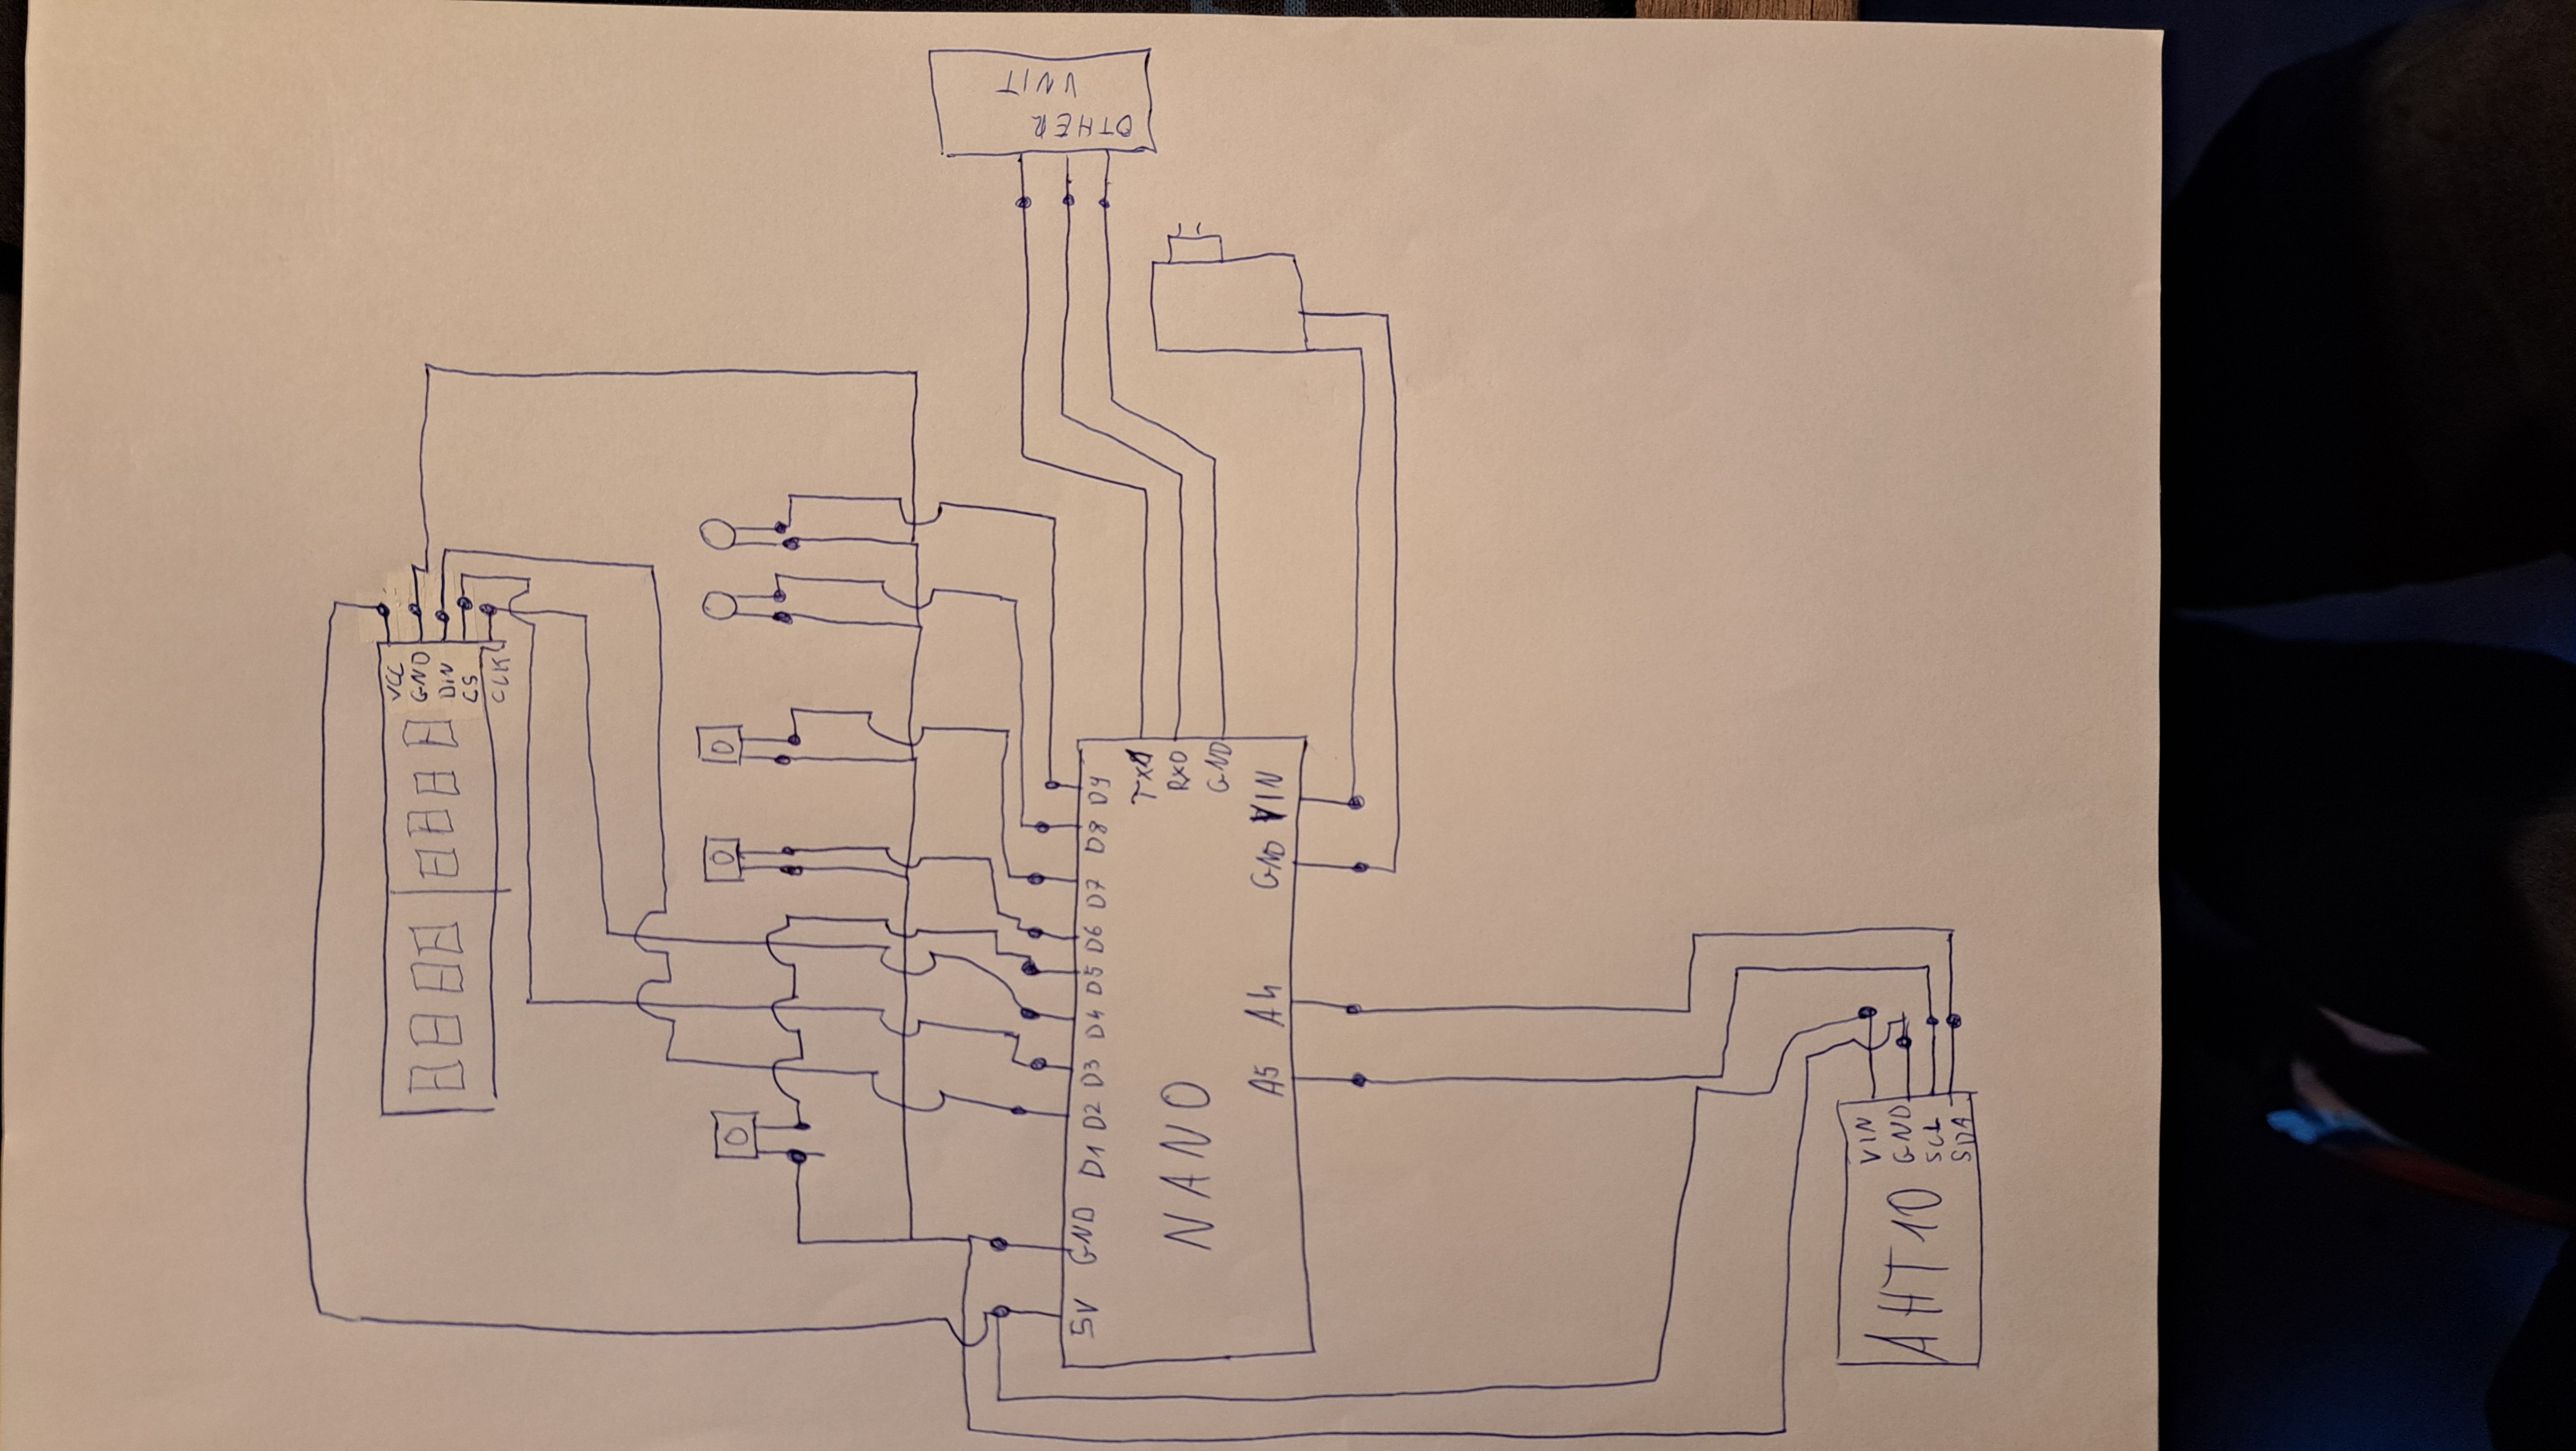
The Schematics
Just like basically all my Arduino projects, I've connected everything to the microcontroller, so it can be controlled and modified just by code.
The code of the Master unit
The code of the Slave unit
×

Social Media
Arduino official site
Raspberry Pi official site
ManaPC official site
Golden Technologies official site
Meta's Business Partner Directory